Una de las formas más dinámicas de agregar impacto y transmitir instantáneamente el paso del tiempo en los videos es mediante la filmación de lapsos de tiempo. En este tutorial, exploramos las opciones clave que tiene para grabar y editar videos de lapso de tiempo para garantizar que tengan un impacto visual profesional.
Qué aprenderás
- La elección entre tomar fotos o videos
- Los cálculos necesarios para disparar timelapses
- Por qué la velocidad de tu sujeto es clave
- Los mejores consejos para capturar timelapses
- Por qué la calidad del metraje es clave
- Los beneficios de las imágenes fijas para los timelapses
- Cómo convertir videoclips estándar en lapsos de tiempo
Lo que necesitarás
- Una cámara con, idealmente, al menos 1080p si no opciones de disparo 4K
- Una cámara con control manual sobre todos los ajustes de exposición
- Un soporte de cámara confiable que permanecerá quieto
- Una calculadora para calcular los ajustes de disparo necesarios
- Una computadora con software profesional de edición de imágenes y/o videos
Los lapsos de tiempo son una excelente forma creativa de indicar el paso del tiempo en videos, como del día a la noche, o para documentar cambios como las mareas que suben y bajan o una flor que se abre lentamente a la luz del sol. A menudo se utilizan de forma creativa en la televisión y las películas.
Por ejemplo, la serie de detectives estadounidense 'Rizzoli &Isles' utiliza con frecuencia secuencias de intervalos breves para indicar el paso de un día, a través de la noche, al día siguiente, mientras que la serie 'House of Cards' utiliza intervalos de tiempo en su secuencia de créditos iniciales.
Pero, ¿cómo deberías grabar timelapses y cuáles son los mejores consejos y técnicas que te ayudarán a darles más impacto?
Modos fijos y de vídeo timelapse:cómo elegir
Tradicionalmente, los lapsos de tiempo se han creado tomando una serie de imágenes fijas en una cámara, a menudo a través de un intervaloómetro incorporado, y luego editándolas juntas para crear una pieza de metraje de lapso de tiempo. Esto le da control sobre todos sus archivos de imágenes fijas, pero puede llevar mucho tiempo si tiene que trabajar en ellos y editarlos antes de crear el lapso de tiempo final.
Una opción alternativa que se ve en algunas cámaras actuales es una función/modo de película de lapso de tiempo dedicado que puede unir automáticamente imágenes fijas en una película de lapso de tiempo.
Las cámaras con modos de película de lapso de tiempo incorporados incluyen las cámaras réflex digitales EOS 5D Mark IV y EOS 80D de Canon, las cámaras de fotograma completo S1R y S1 de Panasonic, la cámara réflex digital Nikon D850 y muchas otras.
- Tutorial de lapso de tiempo de la Nikon D850:cómo configurar los modos de disparo a intervalos y de película de lapso de tiempo
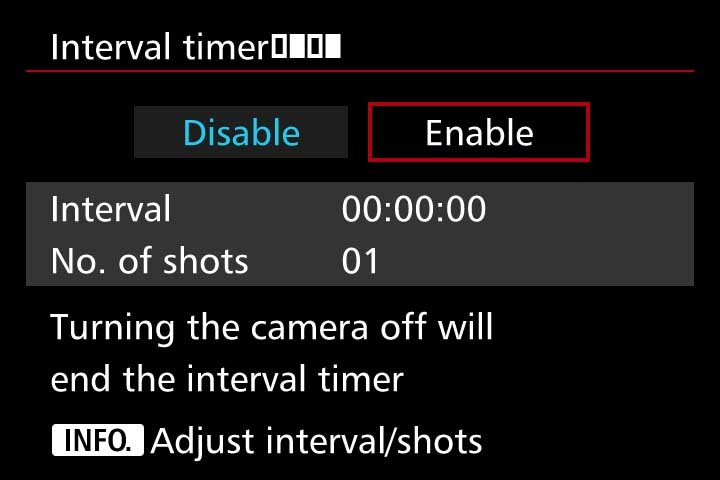
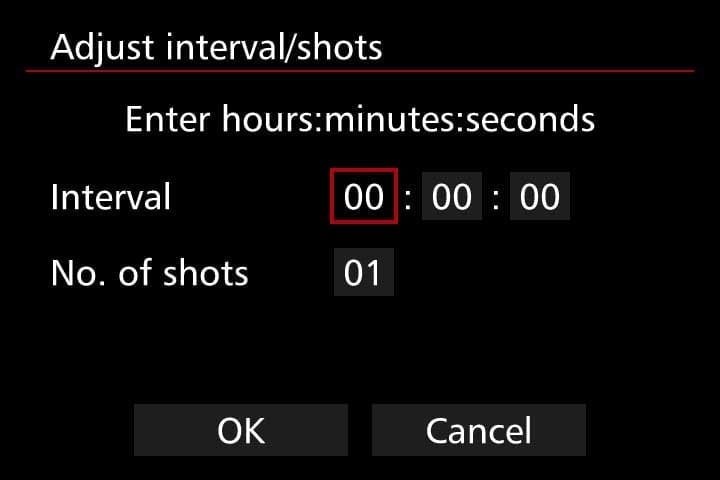
En cámaras con modos de película de lapso de tiempo incorporados, todo lo que necesita hacer es establecer parámetros para los intervalos entre cada disparo, la cantidad de disparos (el máximo disponible diferirá según la cámara) y cuánto tiempo desea que sea el metraje final, en otras palabras, el tiempo de reproducción.
El modo de película de lapso de tiempo lo procesa en una película completa y guarda el resultado como un archivo de video. The down side with this mode is it doesn’t save images as separate files during recording so you have no control over editing individual images.
There are also timelapse specific outdoor cameras such as the Brinno TLC200, which simply requires you to turn it on, set your interval, pick your subject, record and then replay your timelapse videos in-camera.

7 key tips for timelapse videos
There are certain technical considerations and parameters that you need to remember for shooting timelapses:
- As you’re creating a video, for every one second of video you’ll need to capture between 24 and 30 frames. For example, if you’re shooting 12 hours of timelapse and you take a still every minute you’ll end up with 720 still images and, at 24fps, you’ll get a 30 second timelapse. It’s best to plan how long you’d like your final timelapse clip to be and then you can do the maths to work out how best to shoot it.
- You must always consider the speed of your subject when deciding on the intervals between each shot. For fast moving subjects, such as cars or people, this will probably be well under one second whilst documenting a slowly changing landscape may only require a few shots, or a few dozen shots, per day.
- Always do a series of test shots to see if your framing, exposure settings and the chosen intervals between each still image will work. I would recommend setting exposure manually, or at least using aperture priority, so you can guarantee that you retain full control of exactly what the camera will shoot when you are not behind the lens. Relying on any auto settings can cause unwanted things, like flicker, in your final timelapse footage.
- Decide on whether to shoot your stills as JPEGs or as RAW files. If you’re planning a 1080p HD movie JPEGS should be of sufficient quality but if you want your timelapse edit to be any quality above 1080p then shooting RAW files is the best option. Shooting RAW will also give you the flexibility to edit the colours in post or to zoom in or crop on the original image files. This is simply because RAW image files ‘hold’ more information and thus will give you more flexibility at the editing stage.
- If your camera gives you the option to select a 16:9 shooting ratio it’s probably best to do so – this is the traditional cinema ratio, so the result will look more natural in a movie edit.
- A steady camera is essential for timelapses, so always use a tripod. Check to make sure it is level before setting your camera to shoot so you avoid having to straighten out any footage in post-production.
- If your camera doesn’t have an intervalometer or a built-in timelapse video function you should consider using an external remote controller for your camera or even an interval shooting app. There are a few apps available for cameras and smartphones, so just check which one is compatible with your camera or phone. Examples of such apps include Framelapse, Lapse It, Hyperlapse and iMotion.
Quality of footage &exposure length
As mentioned earlier many modern cameras offer timelapse shooting functions but, up until a couple of years ago, the downside of this was that their maximum footage resolution is just 1080p. You must decide on the quality of final footage you want before choosing such a mode or opting to shoot higher res stills and edit them together in post.
The other factor to weight up when considering to shoot stills or video for timelapses is that stills will offer you the flexibility to play with exposure times. As mentioned, shooting video means you must shoot at least 24 frames per second, so no exposure can be longer than 1/24th of a second.
In contrast shooting stills gives the flexibility to shoot longer exposures and, as a direct result, you’ll potentially get timelapses with much more impact, such as star trails or car headlights at night.
How to change standard video clips to timelapses
Whilst the advice and tips mentioned earlier in this blog are the ‘traditional’ ways of shooting timelapses, there is another way… converting standard video clips into a timelapse. Many desktop video-editing suites will allow you to convert a standard clip into a timelapse movie.
For example, in Adobe Premiere Pro, you can adjust the frame rate of a standard video clip in a way that does so by ‘posterizing’ or separating the frames. So, you could adjust a 24fps video to, say, 1fps, which will give a more ‘jumpy’ effect.
You then need to adjust the clip speed/duration (say 800%) of each frame upwards so as to alter the time between each frame, in this case eight times faster. You can experiment with the speed so you get the best look out of your clip. This speed adjustment will result in a sort of stop-motion or timelapse/hyperlapse effect.
If you decide to try this route it’s best to work with clips of around one minute in length and upwards so that you have more information to work with, otherwise you could end up with a very short timelapse clip.

Keep experimenting
Like many choices when shooting video footage you have to marry up the practical side of camera settings and what you want the creative, final result to be. If you’re a newcomer to shooting timelapses it’s perhaps best to start simple and shoot a flower opening. You can then expand this to day to night timelapses and those of moving subjects.
Whatever option you choose for shooting timelapses if you follow the tips outlined above and choose a great subject you should, hopefully, end up with a great piece of timelapse footage. Keep experimenting with different subjects, different lighting situations and different camera settings and you should quickly end up with some timelapses with that are full of visual impact and tell a story.
