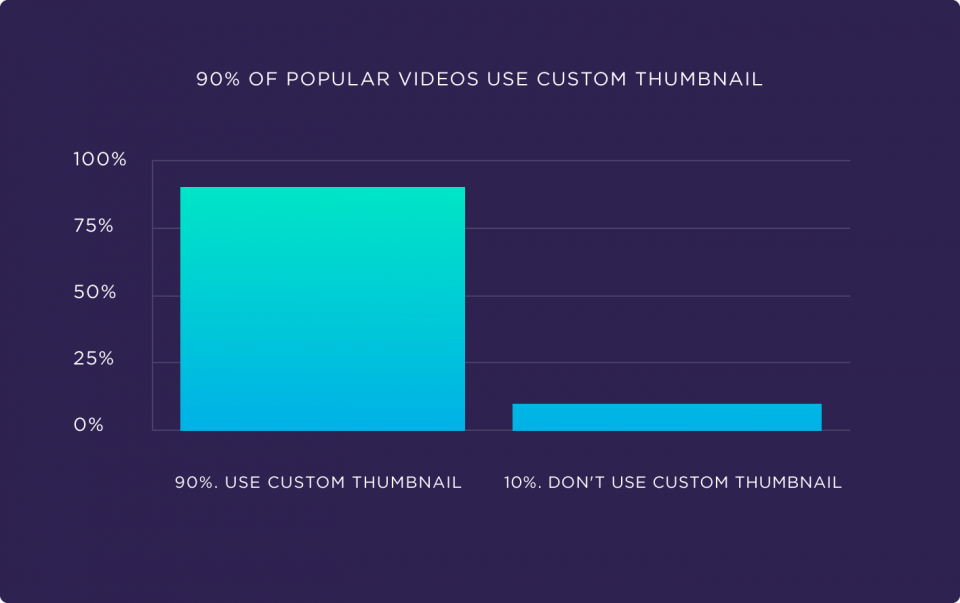
Cada minuto se suben más de 500 horas de vídeo a YouTube. Sin embargo, son solo el 10% de los vídeos de YouTube más vistos los que atraen el 79% de todas las visualizaciones.
Entonces, ¿cómo te aseguras de marcar todas las casillas para crear un vídeo que funcione bien?
Hemos hecho todo el trabajo preliminar y hemos elaborado esta guía definitiva paso a paso sobre cómo hacer un buen vídeo para YouTube para ahorrarte el tiempo y el esfuerzo de resolverlo todo por tu cuenta.
Hemos cubierto todo, desde definir su estrategia de YouTube hasta seleccionar el equipo adecuado y grabar y editar sus videos para los cuales simplemente puede usar InVideo . editor de vídeo en línea
¡Empecemos!
(1) Cómo crear una estrategia de YouTube
(2) Obtener el equipo de YouTube adecuado
(3) Cómo crear buenos vídeos de YouTube en tu teléfono
(4) Planificación de tus sesiones
(5) Grabar su vídeo
(6) Cómo editar un vídeo de YouTube
(7) Subir tu vídeo a YouTube
(8) Optimización para SEO de YouTube
(9) Promoción de sus vídeos de YouTube
(1) Cómo crear una estrategia de YouTube

Elaborar una estrategia eficaz en YouTube implica 4 pilares clave:
(A) Identifique su audiencia
Para empezar, mucho antes que tú récord de hits Quieres poder responder las siguientes preguntas:
- ¿Para quién quiero hacer mis vídeos?
- ¿Qué valor quiero agregar a sus vidas?
Para los creadores de contenido que están comenzando, este es un paso clave para poder identificar a su audiencia; para las marcas, es absolutamente crítico .
Si eres una marca que quiere entender cómo hacer un vídeo de YouTube, es probable que ya sepas quién es tu público objetivo; pero también necesitas descubrir qué les llama específicamente la atención en YouTube, qué están buscando y qué tipo de valor puede aportarles tu contenido.
Ayuda si lo desglosas —
Cree una persona basada en el planteamiento del problema, la edad y la ubicación (y la profesión, si corresponde); esto le ayudará a comprender mejor a su audiencia y le permitirá crear contenido que sea exactamente lo que está buscando.
Por ejemplo, supongamos que es un animador que crea tutoriales principalmente para aficionados y estudiantes de diseño ubicados en los EE. UU., en el grupo de edad de 15 a 30 años. Puedes desarrollar más esta personalidad en términos de lo que el público objetivo podría estar buscando y ahí es donde se te pueden ocurrir ideas para videos.
(B) Encuentre las palabras clave adecuadas
La idea es encontrar palabras clave relevantes que tengan un volumen de búsqueda considerable. El mejor lugar para comenzar sería la plataforma en la que interactuarás con ellos:YouTube.
-
Motor de recomendación automática de YouTube
La barra de búsqueda de recomendación automática de YouTube te indicará los temas más populares que las personas buscan dentro y alrededor de tu tema, y qué tipo de videos se clasifican para ellos.
Por ejemplo, cuando escribe "fotografía" en el cuadro de búsqueda, obtiene los siguientes resultados populares:
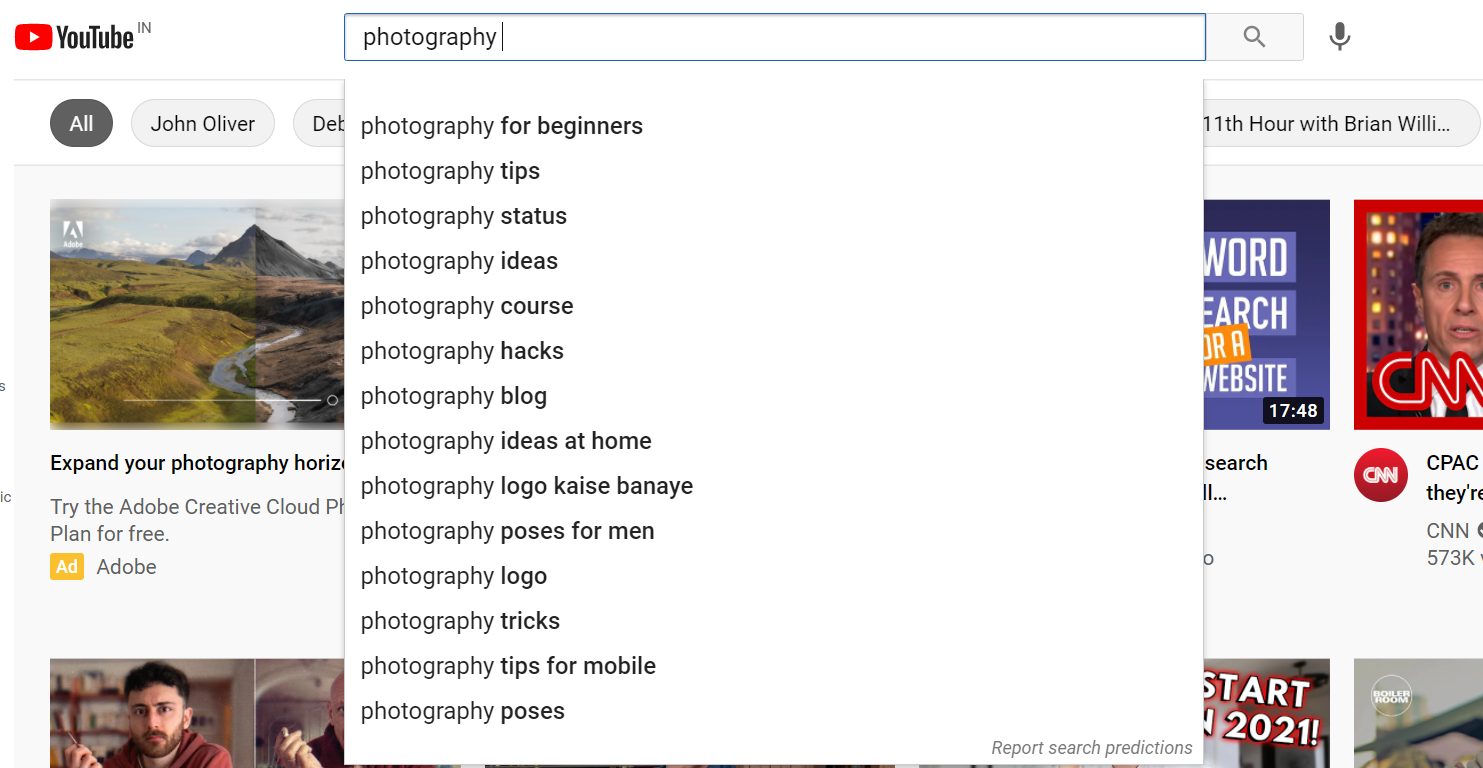
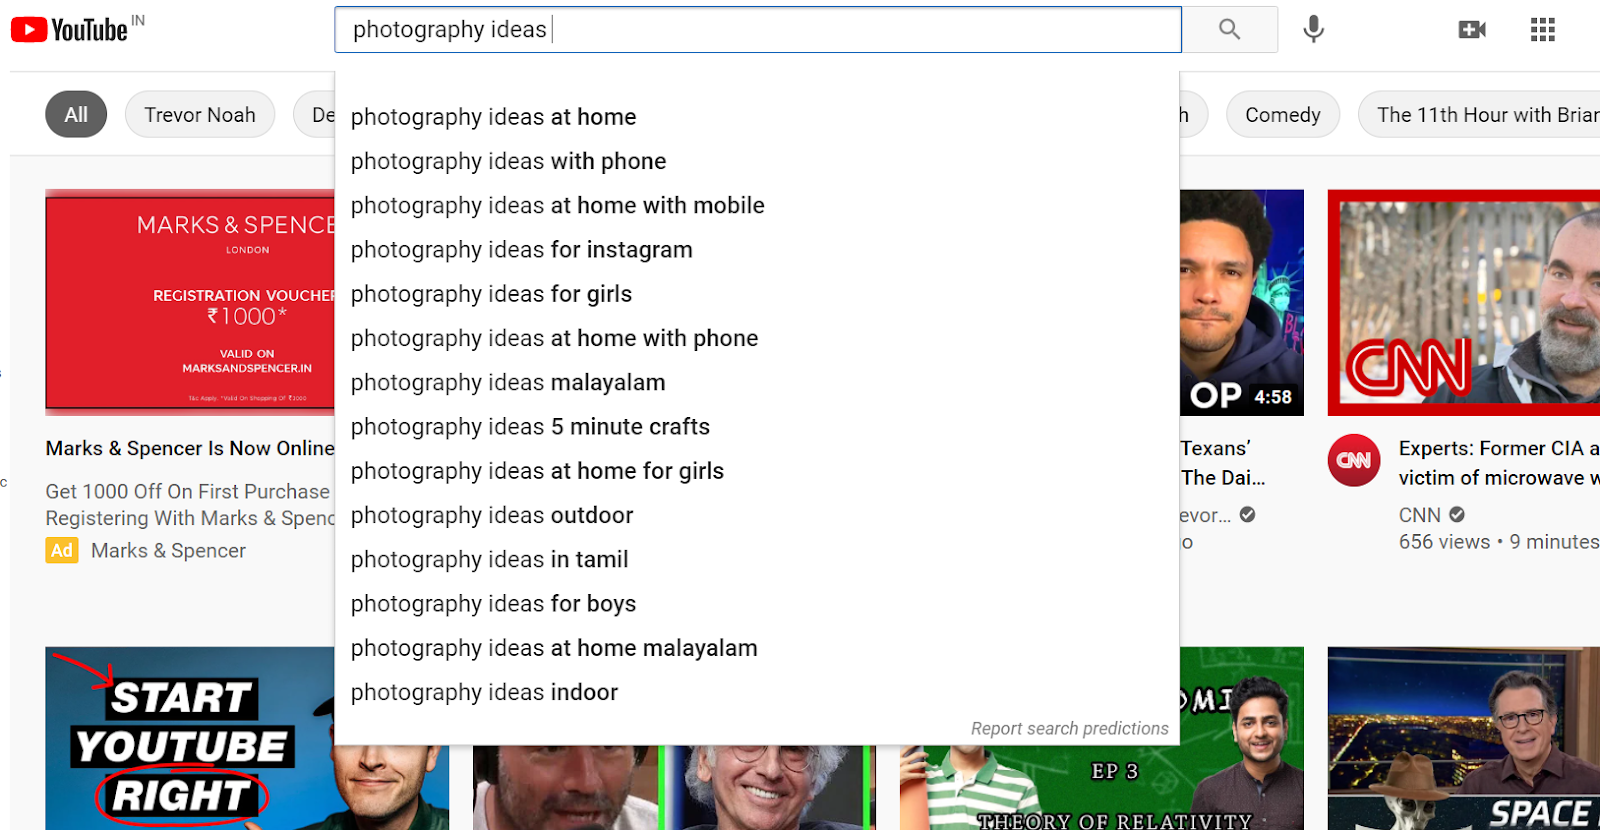
A medida que sigas añadiendo más palabras a tu consulta de búsqueda, seguirás obteniendo intenciones de búsqueda más relevantes que pueden ayudarte a generar ideas para vídeos.
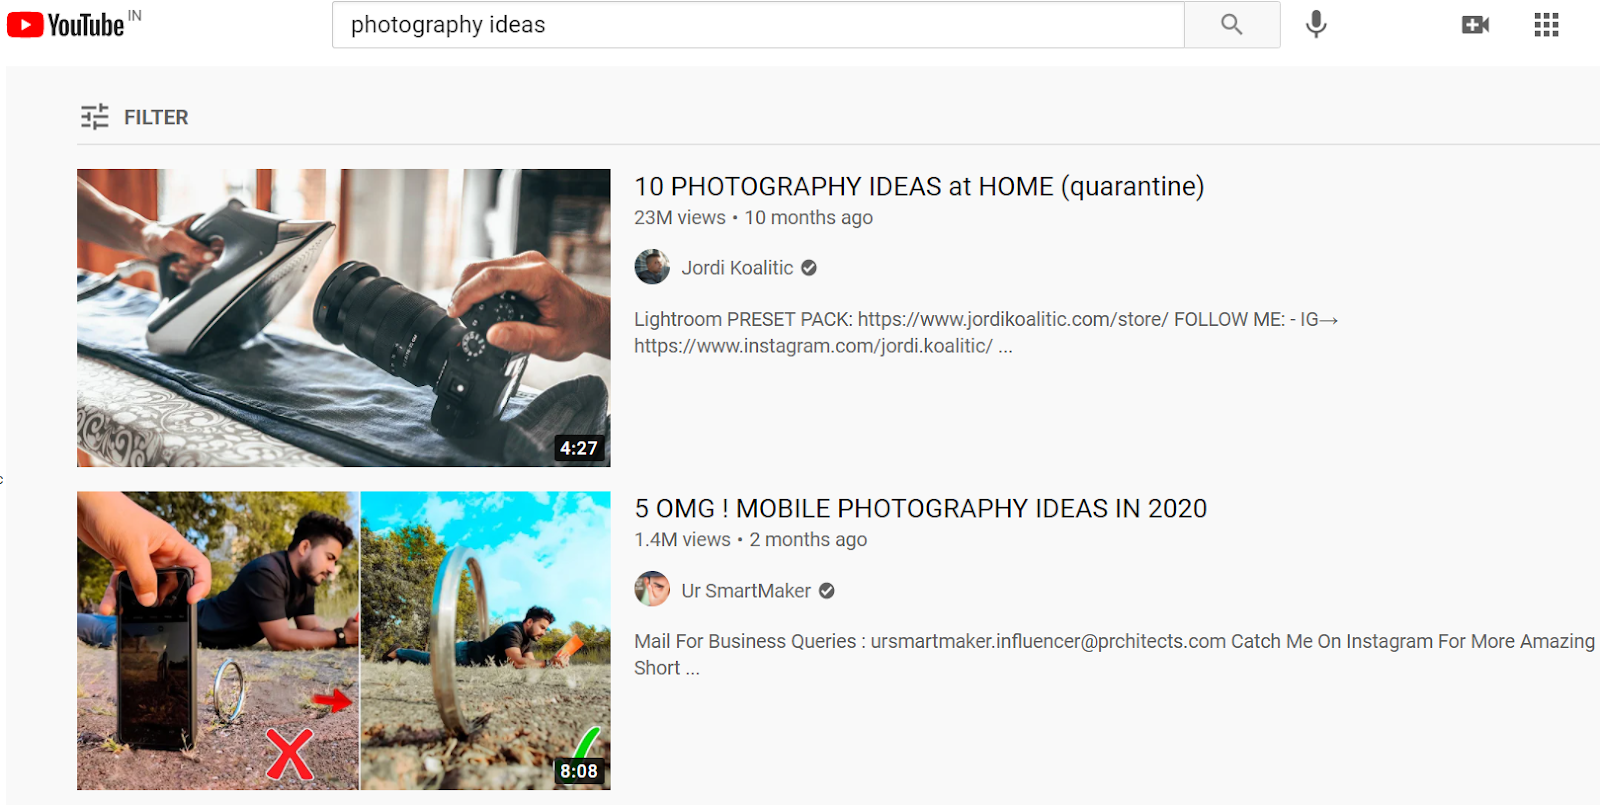
Puedes ir un paso adelante haciendo clic en cualquiera de los resultados y ver los vídeos clasificados para ese resultado.
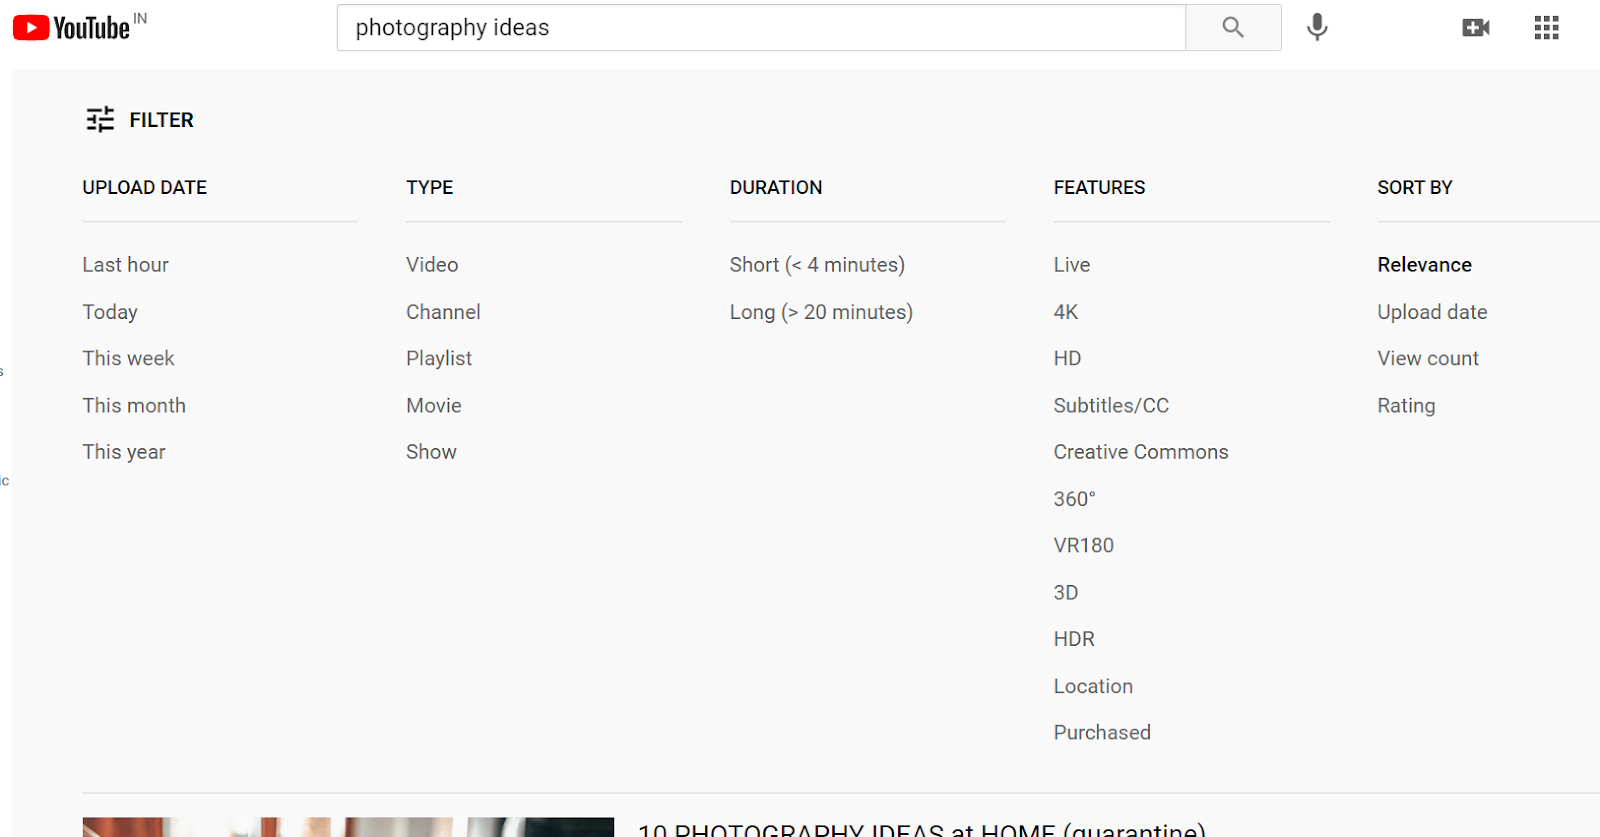
También puedes utilizar filtros para comprobar los vídeos publicados más recientemente y ordenarlos por tipo, duración, características, recuento de vistas, clasificación y duración.
Notarás que muchos títulos tienen palabras similares, como “ideas fotográficas de moda”, “fotografía casera” y “trucos fotográficos”. Estas son palabras clave y profundizaremos en la investigación de palabras clave en la siguiente parte, ¡así que toma nota!
Los vídeos principales también te indicarán qué tipo de formato de contenido funciona mejor para ese tema, como listicles.
Más importante aún, debe ver los vídeos más relevantes para su consulta de búsqueda para identificar cualquier laguna de contenido que pueda llenar. en tu vídeo, pero volveremos a eso en la siguiente sección.
Crea vídeos profesionales de YouTube
En cuestión de minutos con InVideo
Pruébalo gratis
-
Explorador de palabras clave de Ahrefs
Las herramientas de investigación de palabras clave son una excelente manera de profundizar realmente en lo que las personas buscan y descubrir cuál es el tipo de videos que aparecen en los primeros resultados. Si bien YouTube no tiene su propia herramienta de búsqueda de palabras clave, sitios web de terceros como Ahrefs le permite encontrar palabras clave de primer nivel sobre un tema específico.
El mejor lugar para comenzar es escribir la palabra clave que obtuvo de las recomendaciones de Youtube, cambiar la preferencia a YouTube como plataforma y presionar buscar.
Por ejemplo, supongamos que quieres hacer un vídeo sobre cómo hornear un pastel sin horno.
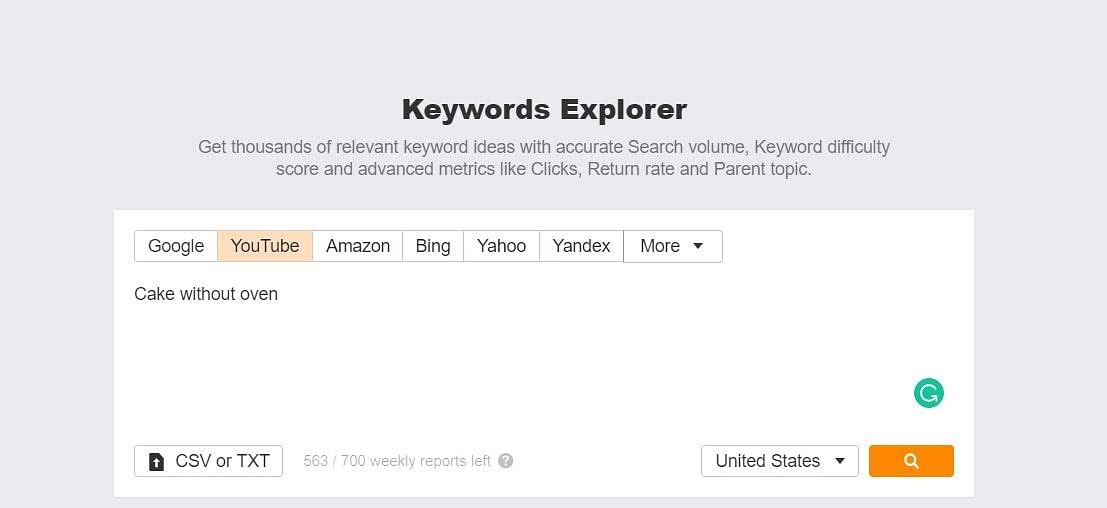
Explorador de palabras clave de Ahrefs le brindará el volumen de búsqueda global y nacional de su palabra clave, así como también le sugerirá algunas otras ideas de palabras clave populares que puede analizar antes de concentrarse en el tema final de su video.
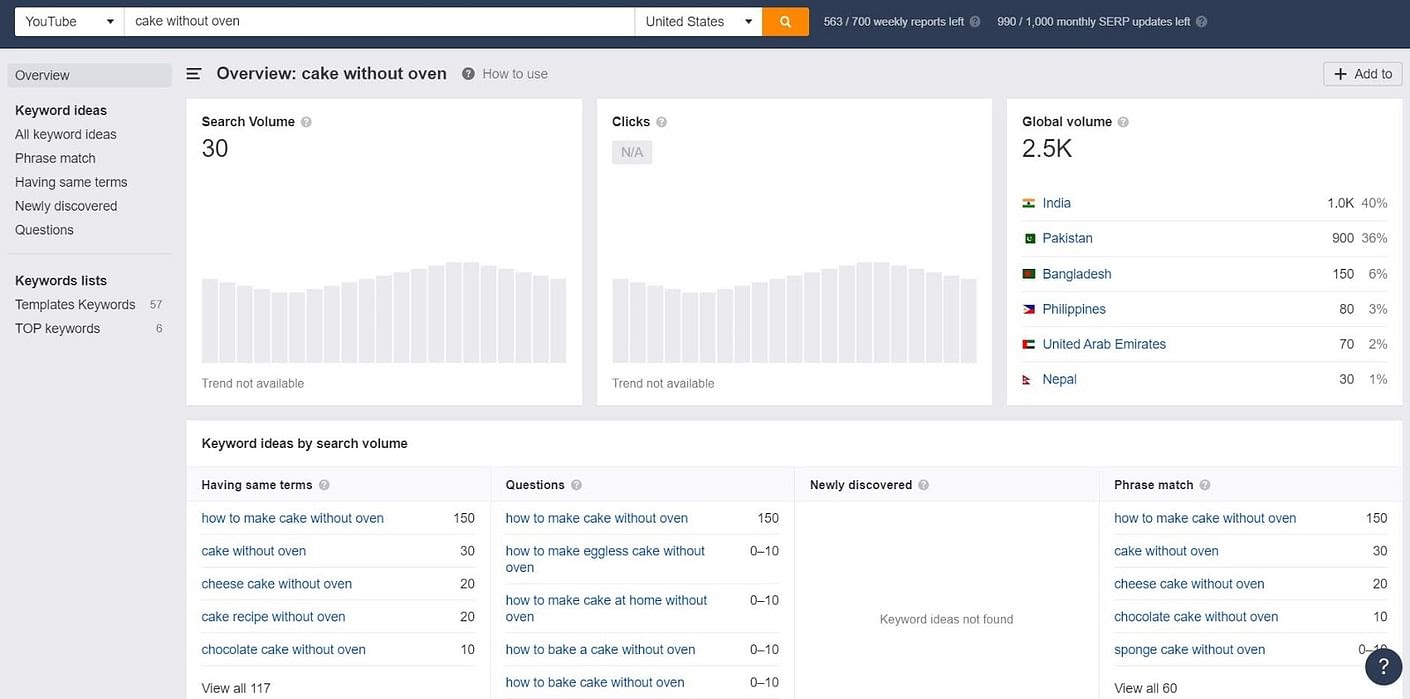
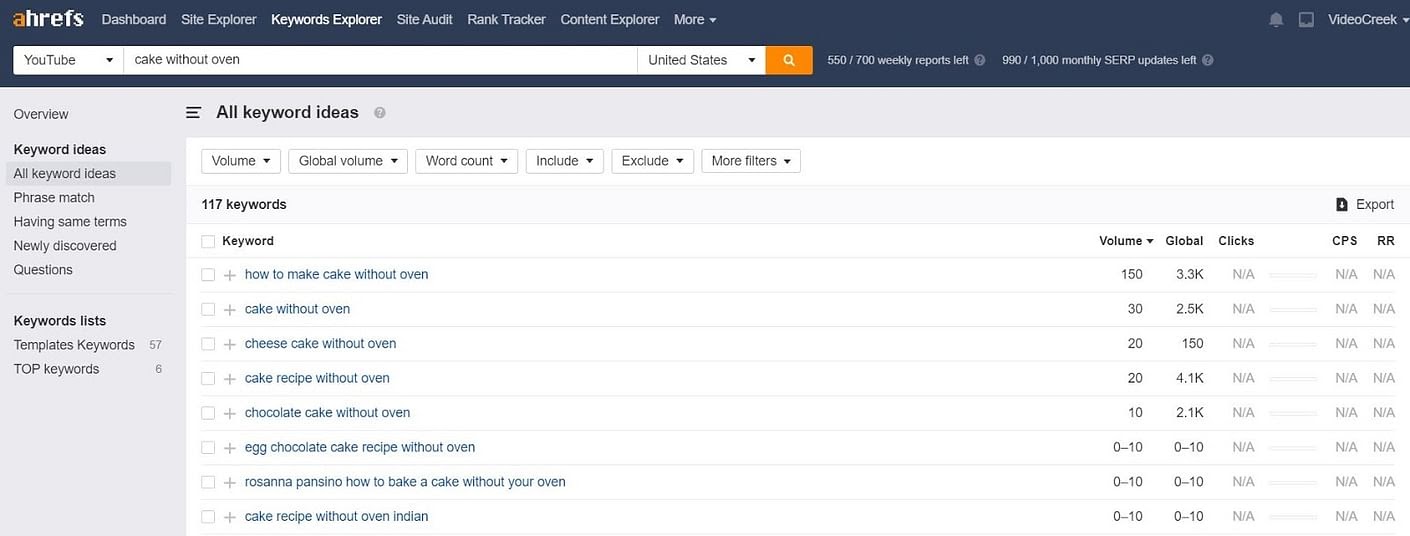
Hay más:también puedes profundizar en cientos de ideas de palabras clave relacionadas con tu término de búsqueda principal cambiando a "Todas las ideas de palabras clave".
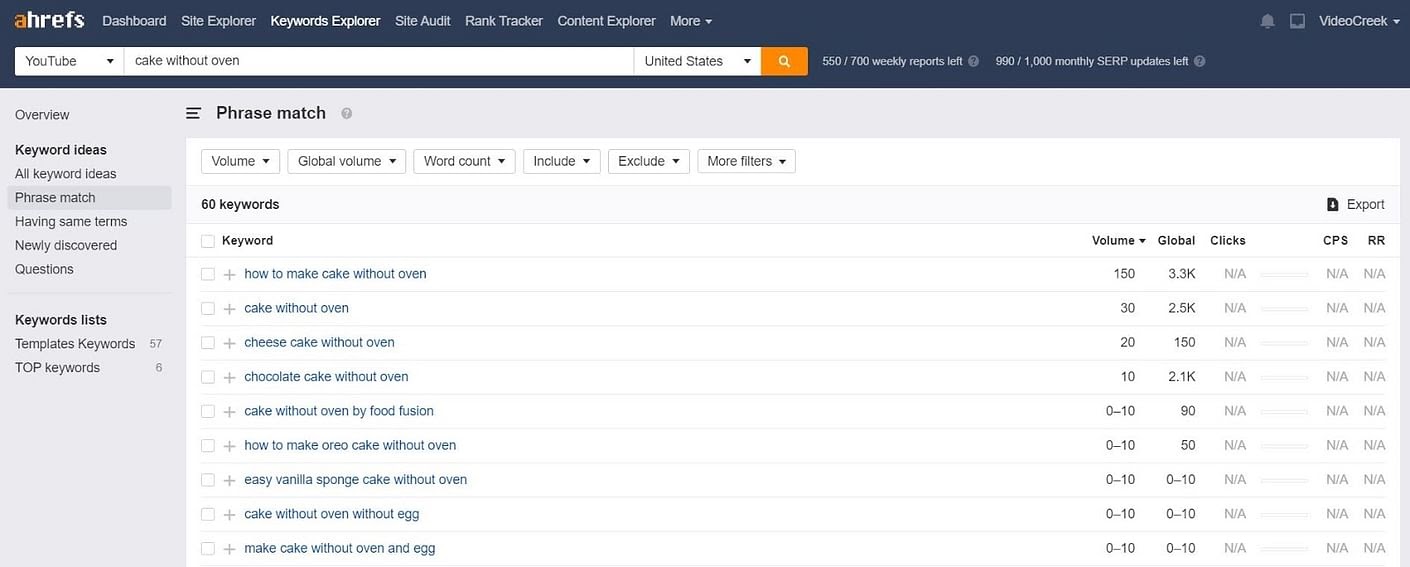
Si desea recomendaciones más específicas sobre palabras clave que incluyan su término de búsqueda principal de forma predeterminada, puede utilizar la opción 'Concordancia de frase'/'Tener los mismos términos' . opciones.
¡Felicitaciones! Ahora ha encontrado las palabras clave que serán los pilares de su título.
(C) Identificar la intención de búsqueda
Si quieres saber cómo crear un vídeo de YouTube que funcione, debes entender la intención de búsqueda de tus espectadores: por qué. un usuario busca un vídeo en YouTube. Aquí hay un desglose paso a paso:
Paso 1: Antes de crear tu vídeo, realiza una búsqueda real en YouTube de las palabras clave que creas que serán relevantes para tu próximo vídeo .
Paso 2: Tal como hizo para identificar a su audiencia, eche un vistazo a los primeros tres a cinco resultados y analice su contenido adecuadamente.
Paso 3: Piense en la intención que YouTube intenta cumplir al mostrar estos videos de alto rango. ¿Todos los videos abordan la pregunta desde el mismo ángulo? Si no es así, ¿cuáles son las preguntas únicas a las que YouTube intenta dar respuesta?
Por ejemplo, si continuamos con el ejemplo de las ideas fotográficas de arriba:
¿La gente busca ideas para fotografiar la vida silvestre y la naturaleza o ideas que puedan explorar en casa? En la imagen de arriba, queda claro que es lo último.
Cuando recorras este proceso, podrás comprender mucho sobre lo que busca tu audiencia potencial, a partir de cómo tu competidor empaqueta sus videos.
Una vez que hayas analizado los vídeos de tus competidores, enumera los temas que deseas abordar — estos también pueden actuar como títulos cuando grabes el video en vivo.
¡Algunos de los mejores YouTubers como Nick Nimmin establecen sus títulos incluso antes de comenzar a escribir el guión del vídeo! Este es definitivamente uno de los pasos cruciales para crear títulos fáciles de buscar y obtener más vistas.
Al hacer esto, te aseguras de satisfacer la intención (o intenciones) de búsqueda con un vídeo que se verá, dará me gusta y se compartirá.
(D)Ideas
Generar ideas para tu canal de Youtube con regularidad durante un largo período de tiempo puede ser una tarea bastante desalentadora. En realidad, es más bien un proceso continuo.
Hemos reunido esta lista exhaustiva de ideas de vídeos de YouTube que cubren más de 22 categorías a las que puedes consultar en busca de inspiración.
Para los principiantes, sugerimos que la forma más sencilla de crear vídeos de alta calidad es contarle a su audiencia más sobre usted y su historia.
Preséntate, presenta una serie de videos o haz un video del "Día en la vida" filmándote realizando tu rutina diaria en un video para que tu audiencia pueda echar un vistazo a tu vida.
¡Aquí hay algunas ideas para comenzar! Y una vez que tengas tu idea en marcha, puedes usar más 5000 plantillas en vídeo para darle vida a tu vídeo.
Ahora que hemos cubierto los conceptos básicos sobre cómo crear una estrategia de YouTube, pasemos a hablar del equipo.
(2) Obtener el equipo de YouTube adecuado
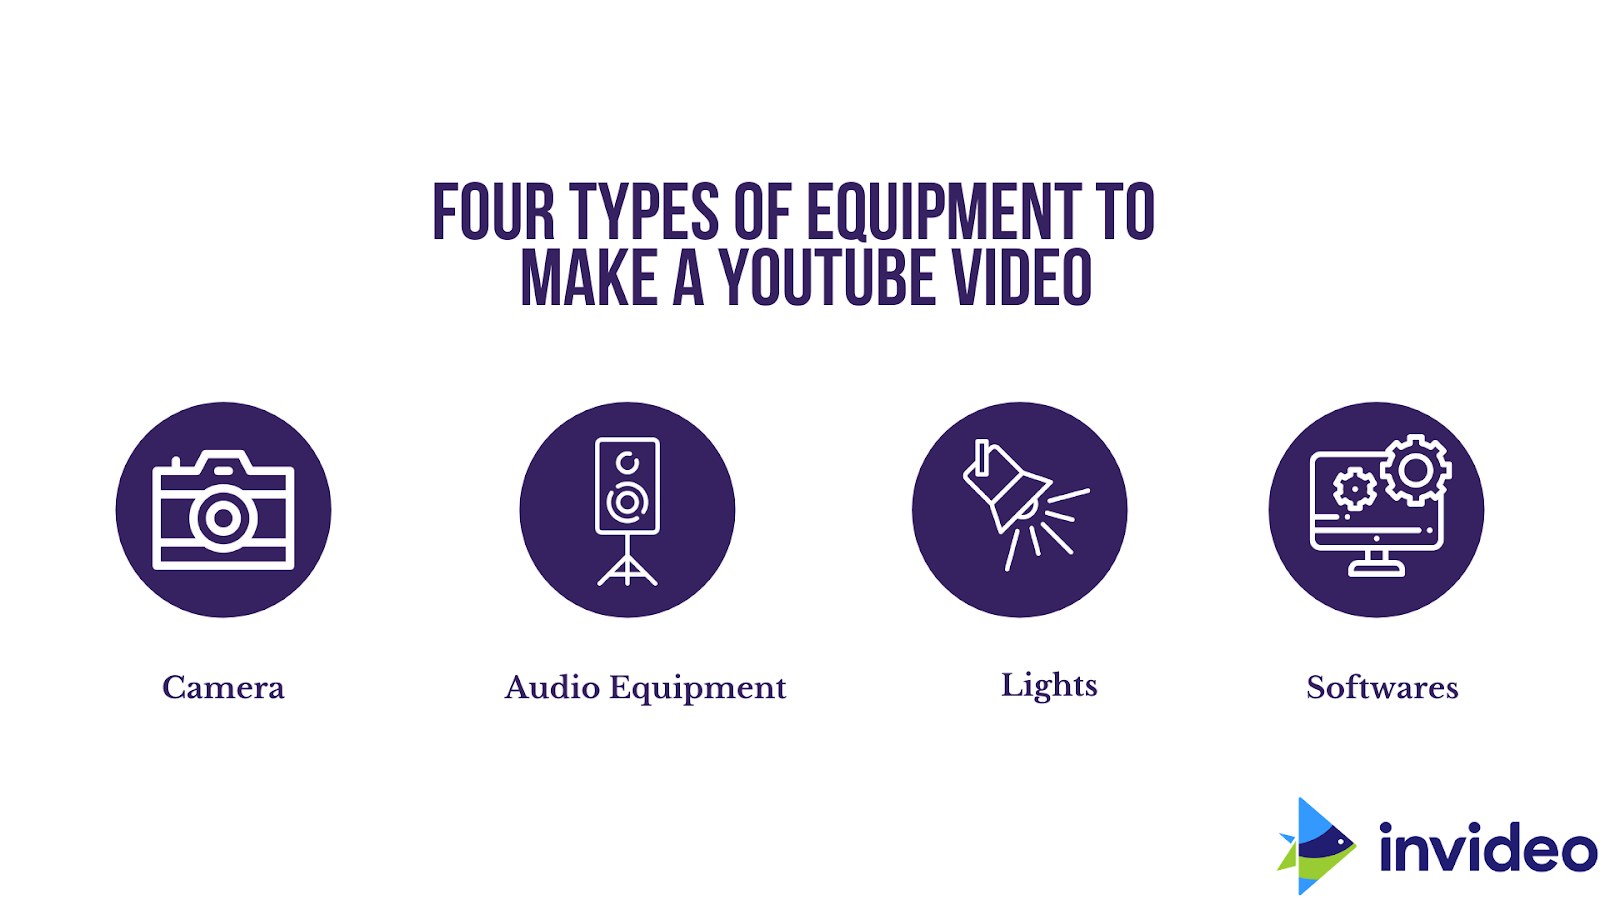
En términos generales, estos son los diferentes tipos de equipos que necesitarás para hacer vídeos de YouTube:
La verdadera pregunta es:¿qué tipo de vídeo estás intentando hacer?
Gran parte de cómo abordas los cuatro factores anteriores depende del tipo de vídeo que estás grabando.
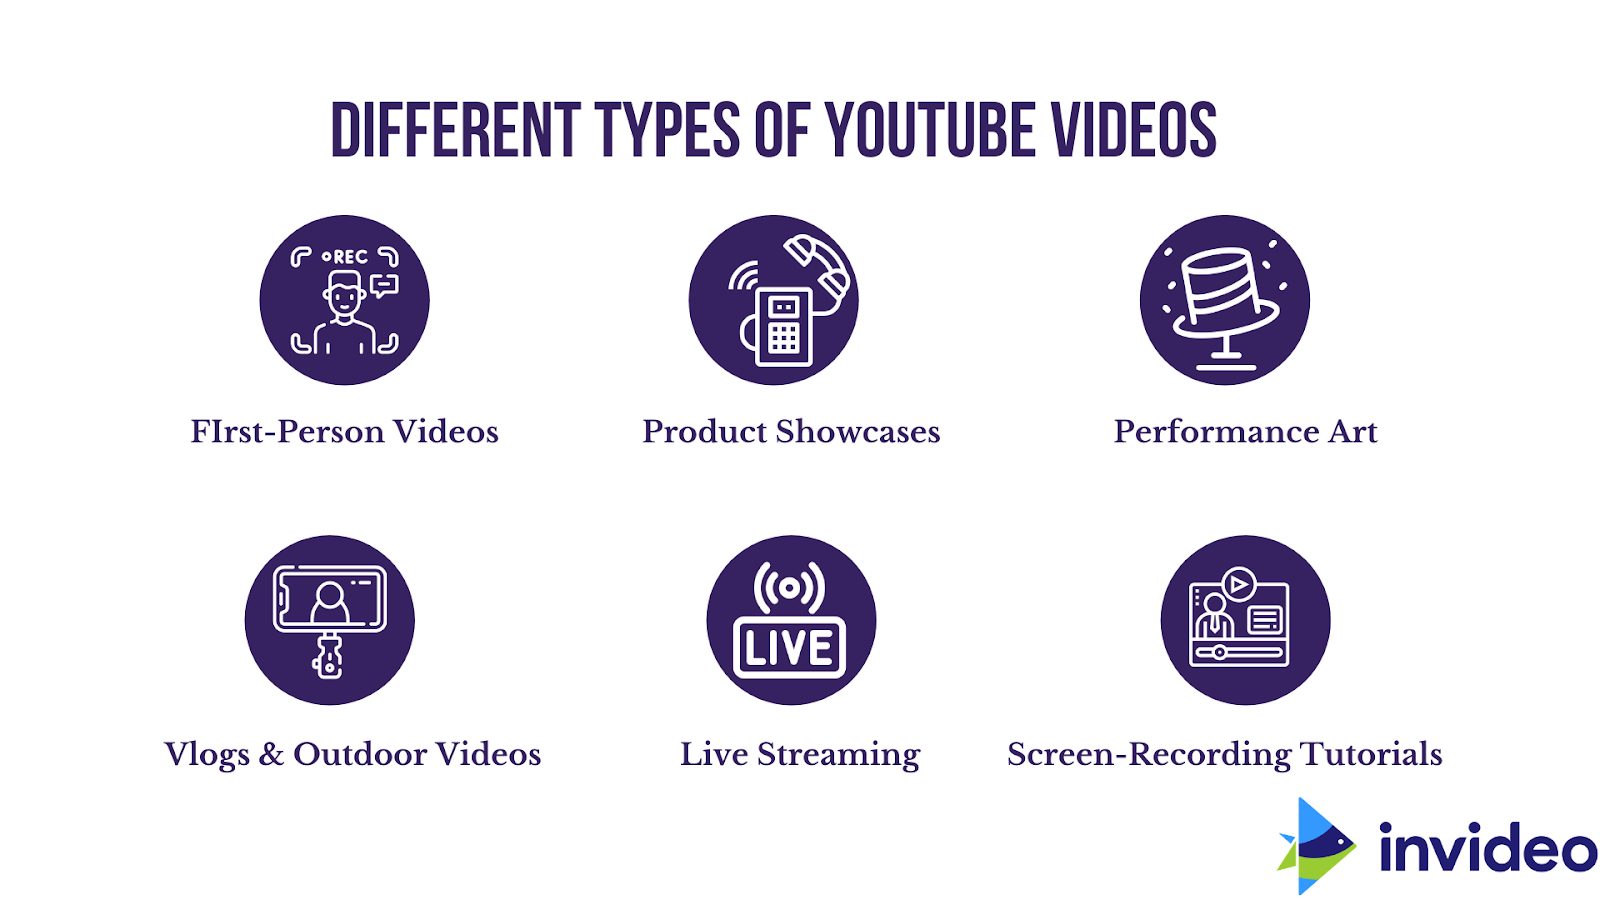
Nos encantaría darte una idea de cómo crear un vídeo de YouTube, así que estos son los tipos de vídeos de YouTube y nuestros recomendaciones sobre el equipo que mejor se adapte a ellos :
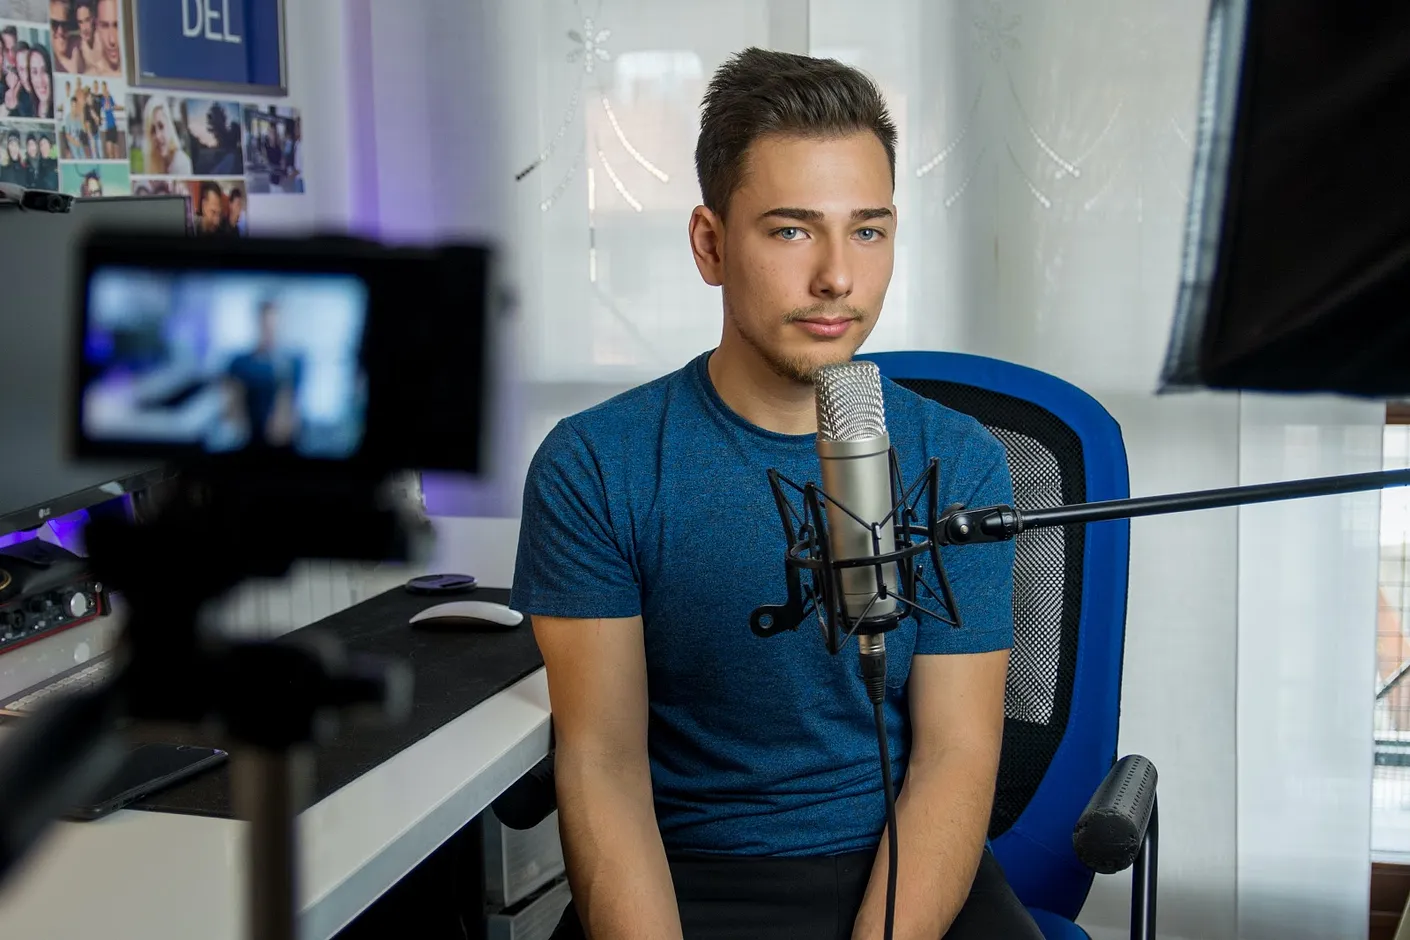
1. Vídeos en primera persona
Estos son simples y se explican por sí solos:configuras la cámara y simplemente hablas directamente con ella; es como tener una conversación individual con tus espectadores.
Aquí tienes todo el equipo que necesitarás con nuestra mejor compra recomendada para cada equipo:
Cámara
- Webcam ($89,99):si tienes una PC y quieres grabar tus vídeos desde allí,
- Videocámara ($228) o,
- Smartphone ($181,50):puedes usar una de estas dos opciones si vas a cambiar tu configuración o moverte en tus videos.
Luz
Las luces anulares son la mejor opción para iluminar a una sola persona en el vídeo.
Audio
- Opta por el micrófono de solapa Deity V Lav Lavalier ($49,99) si estás grabando tus vídeos desde tu teléfono inteligente, o
- El micrófono Blue Snowball ($ 65,99) es una excelente opción si vas a grabar tus videos directamente en tu PC.
Software
(a) InVideo es tu mejor opción si buscas un editor gratuito que esté completamente en la web y que incluya material de archivo gratuito y plantillas listas para usar.
(b) Premier Pro será una excelente opción si eres un editor avanzado que busca crear videos de formato largo.
(c) Be.live y Ecamm serán excelentes opciones si buscas transmitir en vivo en Facebook, Youtube u otras plataformas de redes sociales.
(d) Camtasia será ideal para la grabación de pantalla.
2. Exhibiciones de productos como el desempaquetado del teléfono Vídeos
Para exhibiciones o reseñas de productos, la configuración sigue siendo relativamente sencilla, pero conviene optar por equipos que puedan moverse para poder explorar diferentes ángulos mientras dispara.
Aquí tienes todo el equipo que necesitarás con nuestra mejor compra recomendada para cada equipo:
Cámara
- DSLR ($1199) si quieres disparar en alta calidad o,
- Videocámara ($228) o,
- Un teléfono inteligente ($259):con una cámara mínima de 12 MP para empezar a grabar videos.
Luz
Los paneles LED ($24,99) son la opción más económica.
Audio
Puedes usar:
- Un micrófono de solapa como el RODE Go Compact Wireless ($199) o,
- Un micrófono para podcast como el Maona USB Podcast Mic ($64,99).
Software
(a) InVideo para editar vídeos (también le permite agregar material de archivo y animación, si es necesario),
(b) Premiere Pro para edición avanzada (en caso de que estés haciendo vídeos largos),
(c) Be.live y Ecamm serán ideales si buscas transmitir en vivo en Facebook, Youtube u otras plataformas de redes sociales.
3. Arte Performance
Para esta categoría en particular, la configuración de su equipo debe ser portátil para que pueda moverse con el artista si es necesario.
Aquí tienes todo el equipo que necesitarás con nuestra mejor compra recomendada para cada equipo:
Cámara
- Dispare con un teléfono inteligente ($259) que esté disponible, o,
- Una cámara profesional; esta es la mejor opción y le brinda colores más vivos.
Luz
- Si quieres que la luz te siga mientras te mueves con el sujeto, puedes usar un panel de luz LED en la cámara ($24,99).
- Esta barra de luz de Godox ($239) se puede usar para agregar colores o una sensación cinematográfica a la actuación.
Audio:
Sugerimos utilizar:
- Un micrófono tipo shotgun como el RODE Video ($229), junto con
- Un gato muerto ($29,95) para capturar el audio con claridad.
Diseñados para uso en exteriores, los gatos muertos brindan una capa adicional de protección contra el ruido del viento y otros sonidos.
Software:
- En vídeo, si el vídeo dura menos de 15 minutos y no requiere mucha edición.
- Premiere Pro para un control súper detallado mientras editas el vídeo.
- Be.live y Ecamm serán ideales si buscas transmitir en vivo en Facebook, Youtube u otras plataformas de redes sociales.
4. Vlogs y vídeos al aire libre
Cuando se trata de esta categoría, los equipos estables pero portátiles son lo mejor.
Aquí tienes todo el equipo que necesitarás con nuestra mejor compra recomendada para cada equipo:
Cámara:
Puedes grabar vlogs y vídeos al aire libre en
- Su teléfono inteligente, o
- Puedes utilizar la Canon G7X Mark III ($749,99), conocida como la "cámara de vloggers".
Luz
- Elegirás principalmente fotografiar cuando haya buena luz natural en el exterior.
- Si necesita luces externas, este panel LED en la cámara ($24,99) debería hacer el trabajo.
Audio
Querrá configurar un micrófono portátil que se adapte fácilmente a su cámara. Elige el RODE Go Compact Wireless ($199) para grabar tu audio.
Software
- Utilice InVideo para editar vlogs de menos de 15 minutos; también se puede utilizar para superponer texto, agregar material de archivo y animar, si es necesario.
- Premiere Pro es tu mejor opción para vlogs más largos, ya que son archivos pesados.
- Be.live y Ecamm serán ideales si buscas transmitir en vivo en Facebook, Youtube u otras plataformas de redes sociales.
- Camtasia para grabación de pantalla.
Crea vlogs virales para tu canal
Sin perder horas editando
Comience ahora
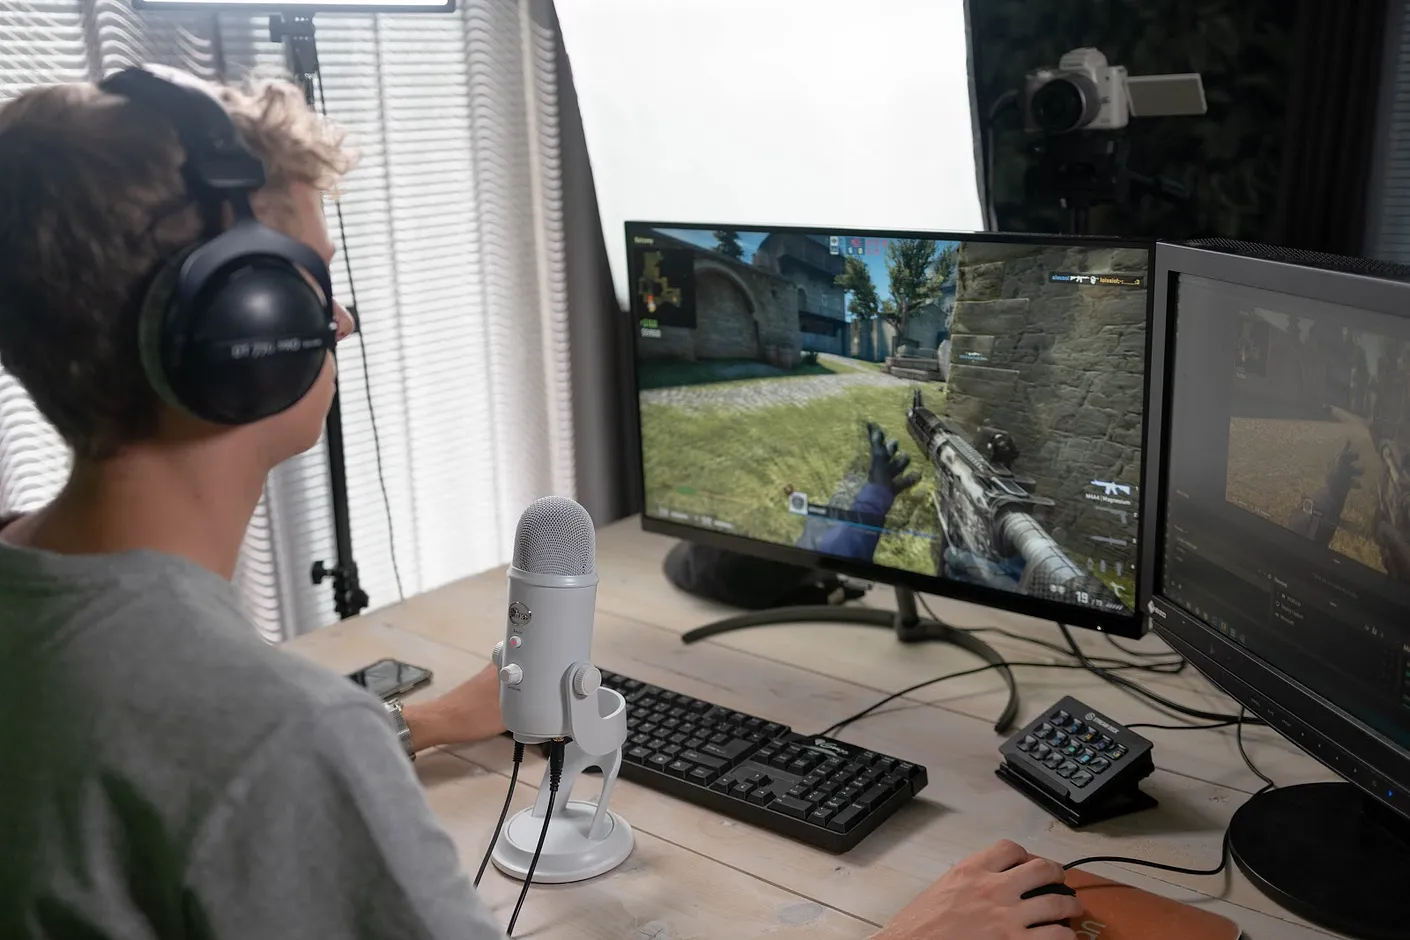
5. Transmisión en vivo
Para la transmisión en vivo, podrá grabar desde su escritorio o puede optar por transmitir en vivo al aire libre; así que, nuevamente, necesitas un equipo estable pero portátil.
Aquí tienes todo el equipo que necesitarás con nuestra mejor compra recomendada para cada equipo:
Cámara
- Para transmitir en vivo desde casa, la mejor opción es la cámara web Logitech Brio ($194,99)
- Si estás de viaje, también puedes transmitir en vivo desde tu teléfono inteligente.
Luz:
- Necesitarás una luz que pueda colocarse en tu escritorio mientras vives cómodamente, como este anillo de luz de 18" ($139) o,
- Algo que se mueve contigo, como un panel LED en la cámara ($24,99).
Audio
- Nuestra principal recomendación para tu transmisión en vivo es un micrófono de podcast como el micrófono Maono USB Podcast AU-A04 ($64,99)
- Si vas a vivir al aire libre, elige el micrófono inalámbrico compacto RODE GO.
Software:
- Puedes elegir entre StreamYard, vMix y Streamlabs OBS para publicarlo.
- Si está utilizando su teléfono inteligente, elija Switcher Studio.
- Utiliza InVideo para crear promociones de tu transmisión en vivo, como publicaciones de historias de Instagram para correr la voz en las redes sociales.
6. Tutoriales de grabación de pantalla
Necesitará una grabadora de pantalla que guiará a su audiencia a través de un tutorial paso a paso además de su proceso de pensamiento.
Aquí tienes todo el equipo que necesitarás con nuestra mejor compra recomendada para cada equipo:
Cámara
Utilice una cámara web ($94,95) o su teléfono inteligente ($250) para grabarse.
Luz
Una luz más sencilla bastará.
Audio:
Opta por un micrófono para podcast o un micrófono de solapa.
Software:
- Puedes elegir entre OBS, grabador de pantalla DU y Camtasia para grabar la pantalla.
- Puedes utilizar Premiere Pro para editar tu tutorial.
Sabemos que esto es sólo un breve vistazo del tipo de equipo que necesitarás para crear un vídeo de YouTube.
Si quieres profundizar en todas las opciones de equipos disponibles para elegir, puedes consultar esta guía súper detallada sobre todo lo relacionado con los equipos de YouTube.
(3) Cómo crear buenos vídeos de YouTube en tu teléfono
Aunque hemos compartido el equipo exacto que puedes necesitar para cada tipo de video, si recién estás comenzando, puedes usar cualquier equipo que ya tengas, especialmente si no quieres invertir en mucho equipo por adelantado. Muchos YouTubers inician sus canales solo con sus teléfonos inteligentes.
Por eso, hemos elaborado esta guía paso a paso sobre cómo hacer un vídeo de YouTube con el teléfono que ya tienes, ya sea un iPhone o un Android.
Sigue leyendo para descubrir cómo hacer un vídeo de YouTube sin cámara.
¿Qué equipo necesitas para hacer buenos vídeos de YouTube en tu teléfono?
La cuestión es que puedes comenzar colocando tu teléfono en el alféizar de una ventana o en una estantería y usar el micrófono incorporado para escuchar el sonido.
Pero hay algunos equipos básicos que recomendamos y que te ayudarán a llevar el contenido de tu teléfono inteligente al siguiente nivel.
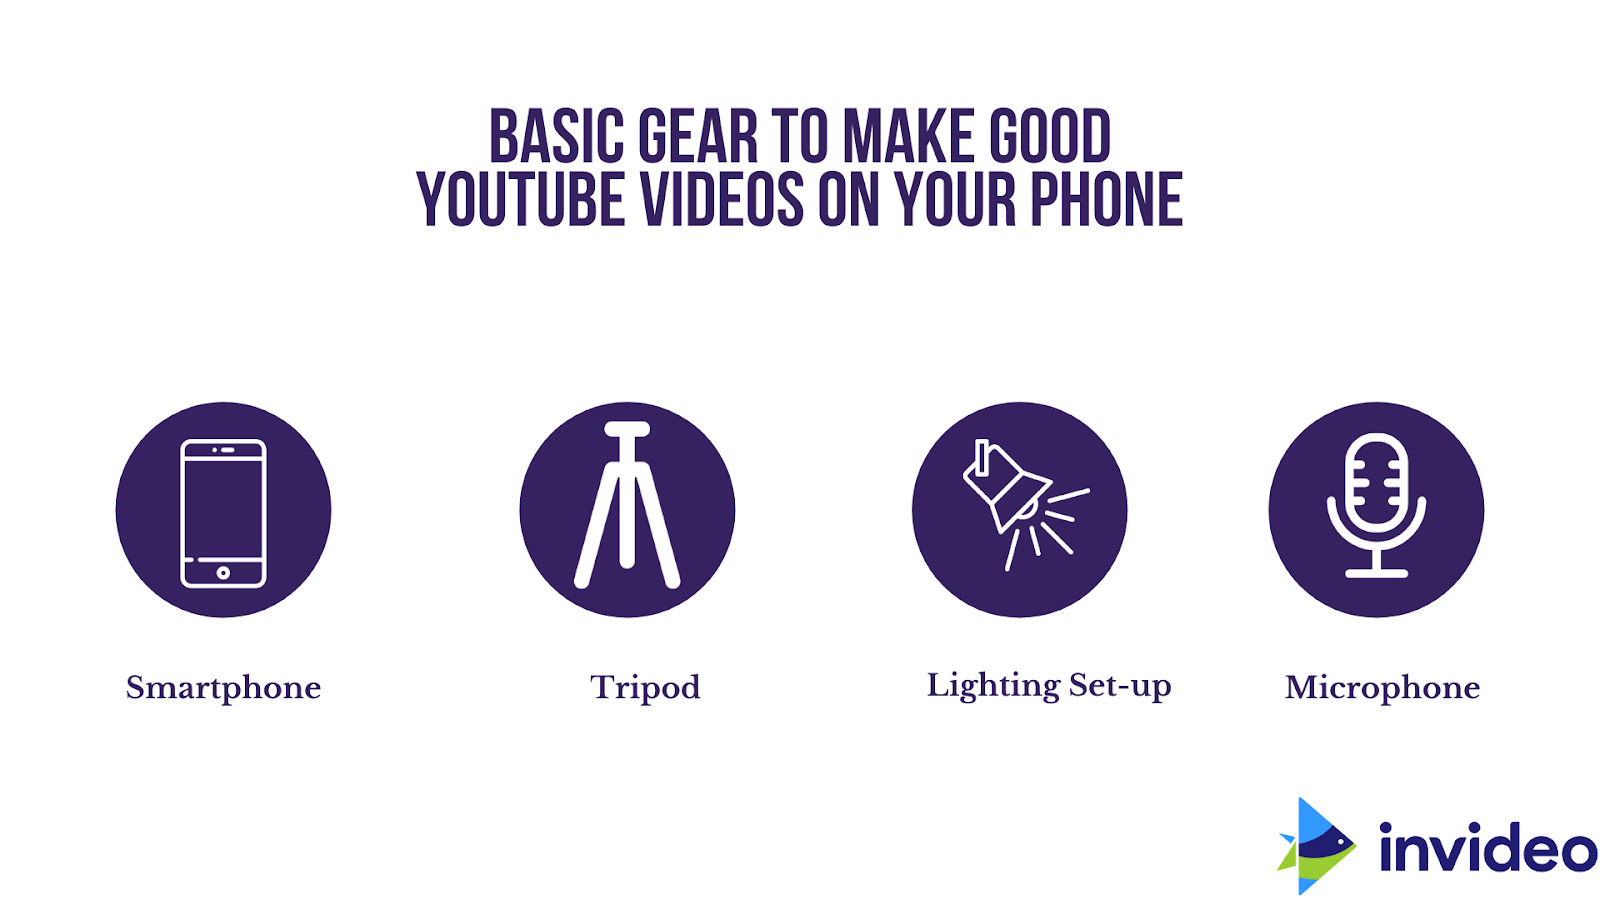
1. Teléfono inteligente
Puede comenzar con cualquier teléfono inteligente que esté utilizando. Las cámaras de la mayoría de los teléfonos inteligentes le brindarán una salida de metraje de 1080p; Si puedes grabar en 4k, definitivamente deberías hacerlo.
En caso de que esté dispuesto a actualizar su teléfono, estas podrían ser sus mejores opciones para crear videos de YouTube de alta calidad:Sony Xperia 1 II ($1198), Google Pixel 4 ($751) o el iPhone 12 Pro Max ($1199).
2. Soporte para trípode y smartphone
Si bien es importante tener un buen teléfono inteligente, es igualmente importante contar con el equipo de soporte que le dará a tu video un aspecto profesional.
He aquí por qué necesitas un soporte para teléfono inteligente y un trípode para disparar con un teléfono inteligente:
- Aportan estabilidad
Los videos portátiles son inestables y tambaleantes, lo cual es la forma más fácil de desanimar al espectador y hacer que se aleje del video. Con un trípode y un soporte para teléfono inteligente, tus vídeos se verán más estables, profesionales y nítidos.
- Para filmarte
Básicamente, usar un trípode libera tus manos, para que puedas capturarte a la distancia que desees de la cámara. ¡Incluso puedes tomar una foto grupal y aparecer en ella también!
Esto también significa que puedes interactuar con tu entorno y experimentar con tomas creativas. Para tomarte fotos, necesitarás configurar el temporizador en la configuración; algunos trípodes incluso vienen con controles remotos inalámbricos que te permiten activar el obturador a distancia.
- Esencial para time-lapses
Siempre que crees vídeos a intervalos, siempre debes hacerlo con un trípode porque requiere que la cámara esté estable durante un período de tiempo prolongado.
Esto se debe a que los time-lapse se crean editando en conjunto una secuencia de tomas que se capturan después de ciertos intervalos de segundos, minutos u horas; Luego se combinan en un breve videoclip. Para obtener los mejores resultados, es esencial mantener el disparo constante en todo momento.
- Perfecto para panorámicas de paisajes
Una serie de tomas que se unen para crear una imagen larga, ya sea en la cámara o durante la edición, las tomas panorámicas a menudo se toman en modo horizontal.
Dado que vas a sostener tu cámara y disparar durante mucho tiempo, un trípode y un soporte para teléfono inteligente pueden ayudarte a mantener tus tomas estables y asegurarte de que los marcos coincidan entre sí; De esta manera, el proceso de “unir” las tomas también se facilita.
Opte por el trípode de aluminio ligero Ravelli APLT4, que ofrece una excelente relación calidad-precio. Viene con una bolsa de transporte para facilitar su transporte, así como un soporte universal para teléfono inteligente, lo que lo hace compatible con cualquier teléfono inteligente que tenga.
3. Micrófono y su adaptador de teléfono compatible
Necesitará un adaptador que conecte su micrófono a su teléfono inteligente; aquí tienes un adaptador TRS a TRRS que te servirá; Mire el vídeo a continuación para ver cómo funciona.
Puedes utilizar un micrófono de solapa (un micrófono pequeño que se utiliza para permitir el funcionamiento con manos libres, normalmente provisto de pequeños clips para sujetarlo a cuellos, corbatas u otra ropa) y engancharlo a tu camisa.
Sugerimos el micrófono de condensador electret BOYA BY-M1 de 3,5 mm con adaptador de 1/4 ″ para teléfonos inteligentes, iPhone, cámaras DSLR, PC, ¡que cuesta poco menos de $ 20! Esta opción asequible garantiza que capture su voz con claridad y que el audio suene preciso, mientras que el micrófono en sí permanece discreto y es manos libres; perfecto para crear vídeos en tu teléfono.
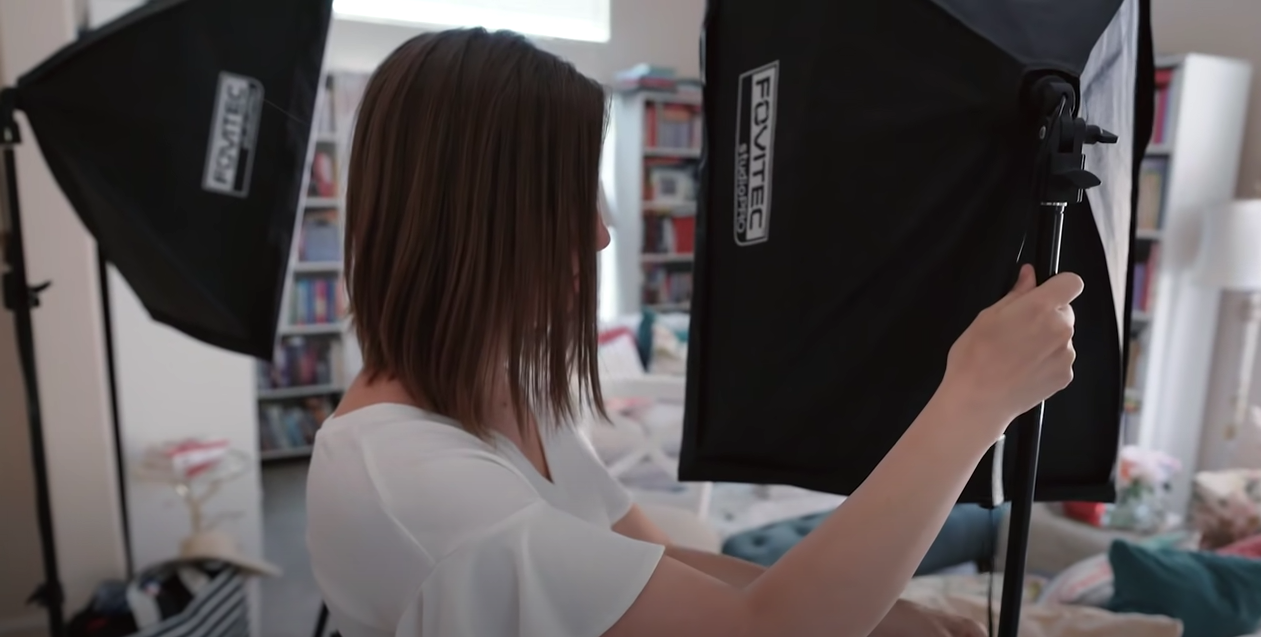
4. Kit de iluminación
Sugerimos optar por el kit de iluminación de estudio fluorescente Fovitec de 2 luces y 1000 W, cajas de luz de 20 ″ x 20 ″, con bombillas y soportes de iluminación para fotografía de retratos y producción de video por $99,95 .
Este es un kit de iluminación que es fácil de aprender para todos los niveles; también es versátil, ya que puedes crear una variedad de estilos simplemente cambiando las posiciones de las dos luces.
Todos estos (aparte del teléfono inteligente) cuestan menos de $150 y son opcionales.
Ahora que tienes tu equipo cubierto, simplemente puedes seguir estos pasos para comenzar a hacer vídeos de YouTube en tu teléfono:
Paso 1:Encuentra el mejor ángulo de cámara
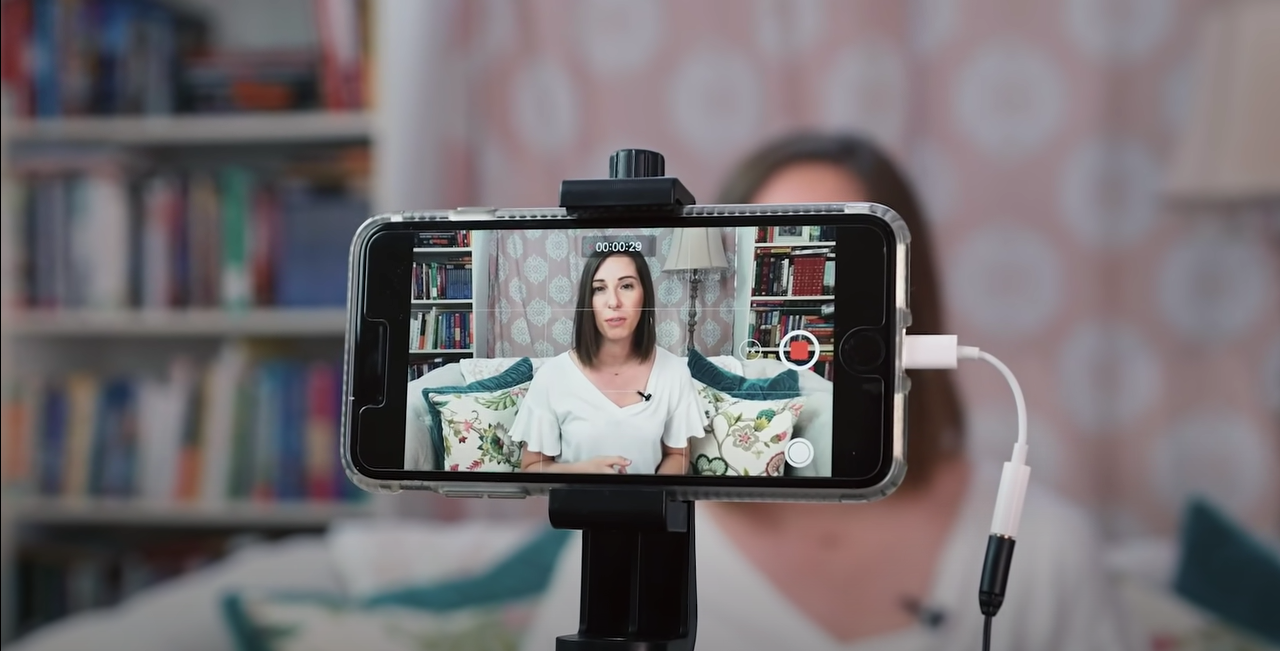
En primer lugar, antes de bloquear la toma y configurar cualquier equipo, pon tu teléfono en modo selfie y familiarízate con la habitación.
Camina y mira cómo se ve el fondo contigo en el marco.
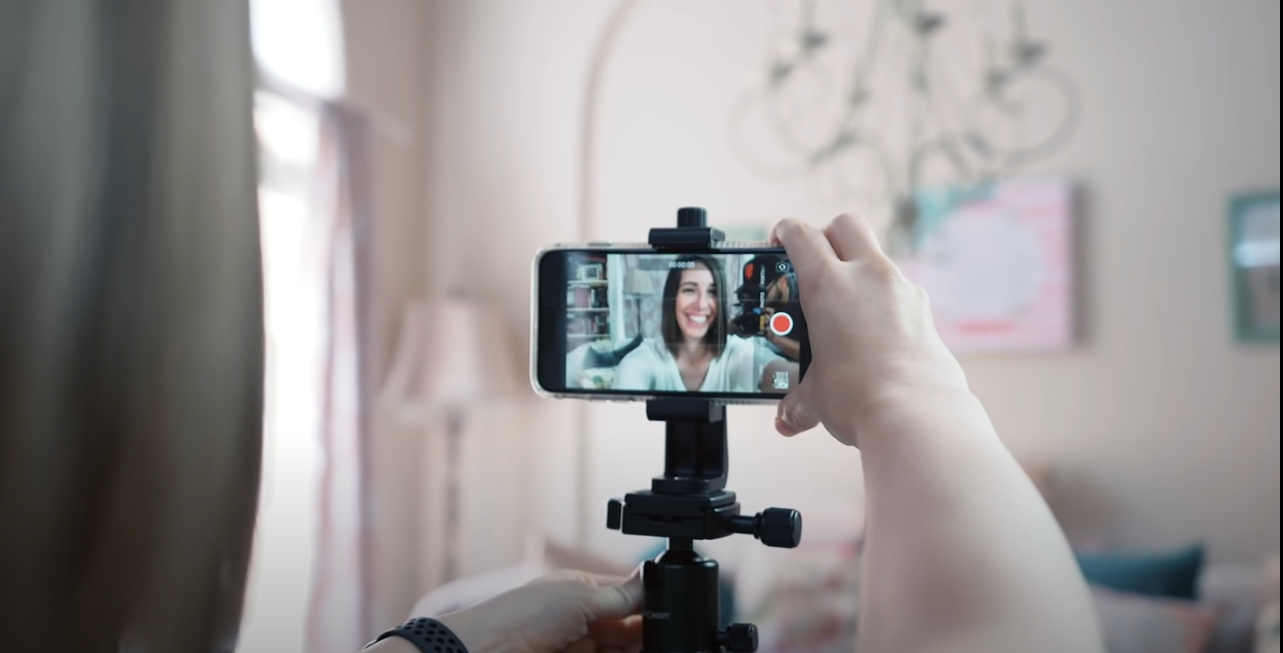
Fuente de la imagen:Think Media
¿A qué distancia quieres que estén el trípode y la cámara del teléfono? ¿El fondo está demasiado ocupado para tu gusto?
Asegúrate de responder preguntas como estas para encontrar la toma perfecta para tu vídeo de YouTube.
Paso 2:configura tu equipo y accesorios de vídeo
Éste se explica por sí mismo.
Querrás probar un poco con tu equipo y descubrir qué funciona mejor para ti en términos de sonido e iluminación.
Monta tu teléfono y ajusta el ángulo y la altura.
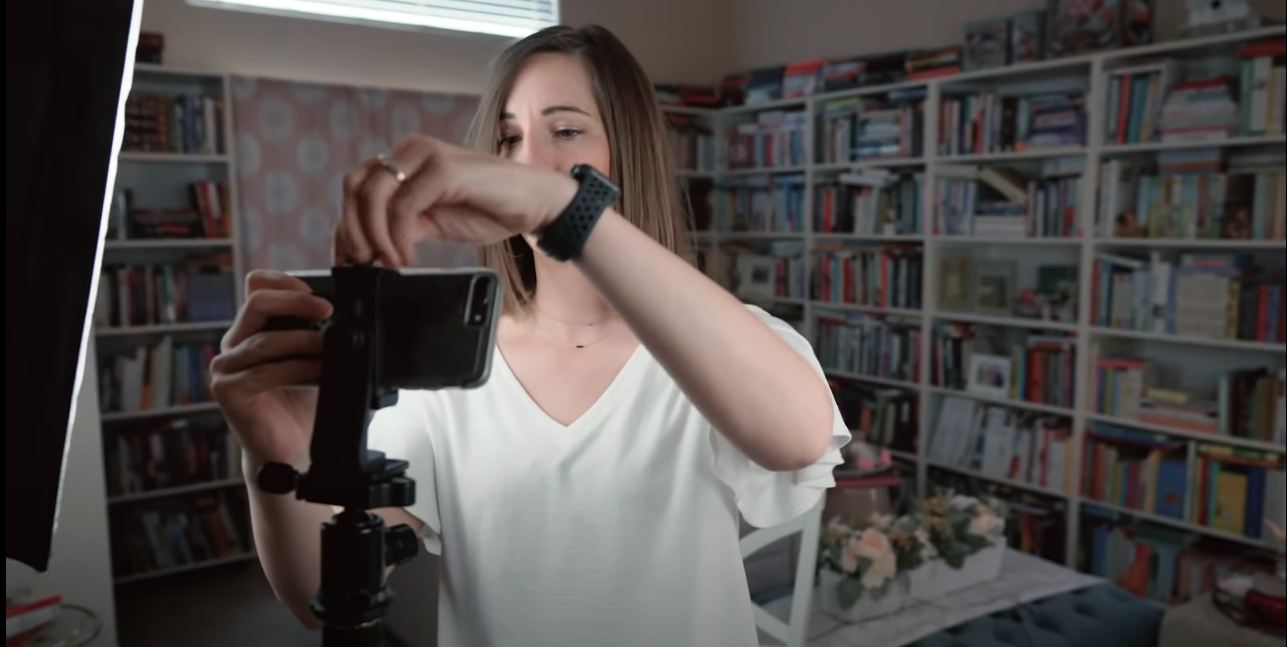
Configura tu kit de iluminación.
Conecte el adaptador a su teléfono para poder conectarle el micrófono:
Y engancha el micrófono de solapa:
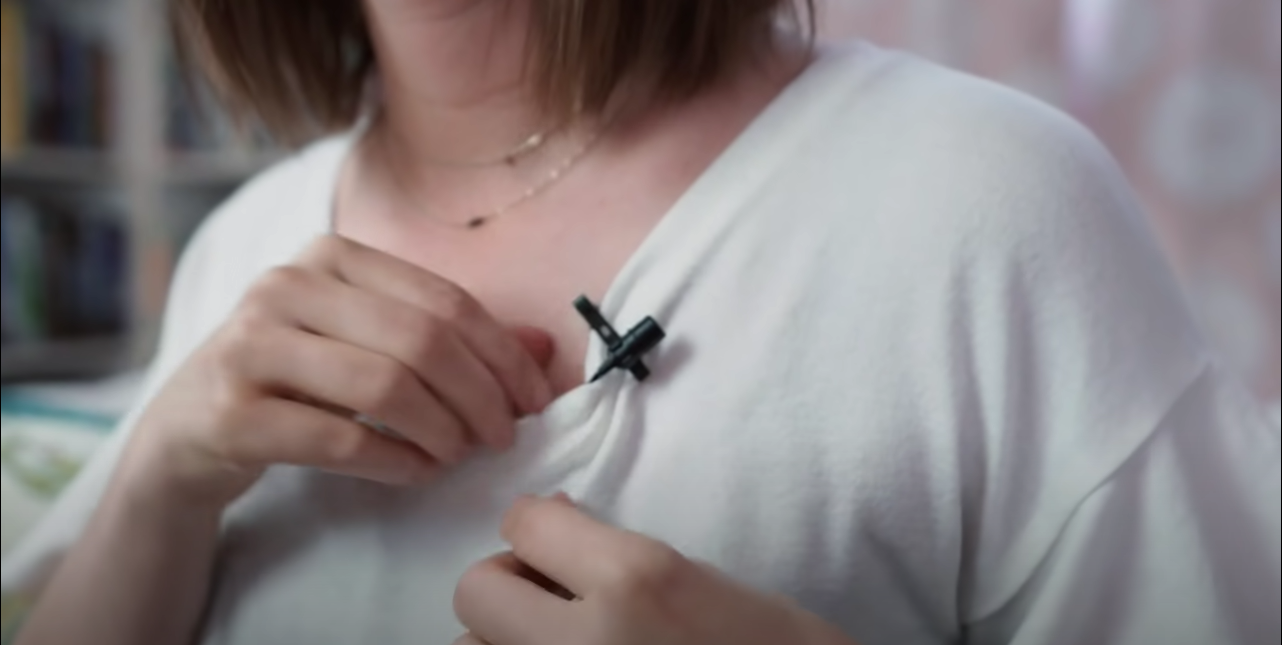
¿Listo para el siguiente paso?
Paso 3:bloquea tu disparo
Una vez que tenga una idea de la habitación y el fondo que desea, le sugerimos que vuelva a desactivar el modo selfie del teléfono y tome fotografías con la cámara normal. , ya que la cámara normal de la mayoría de los teléfonos ofrece una calidad superior en comparación con la cámara para selfies.
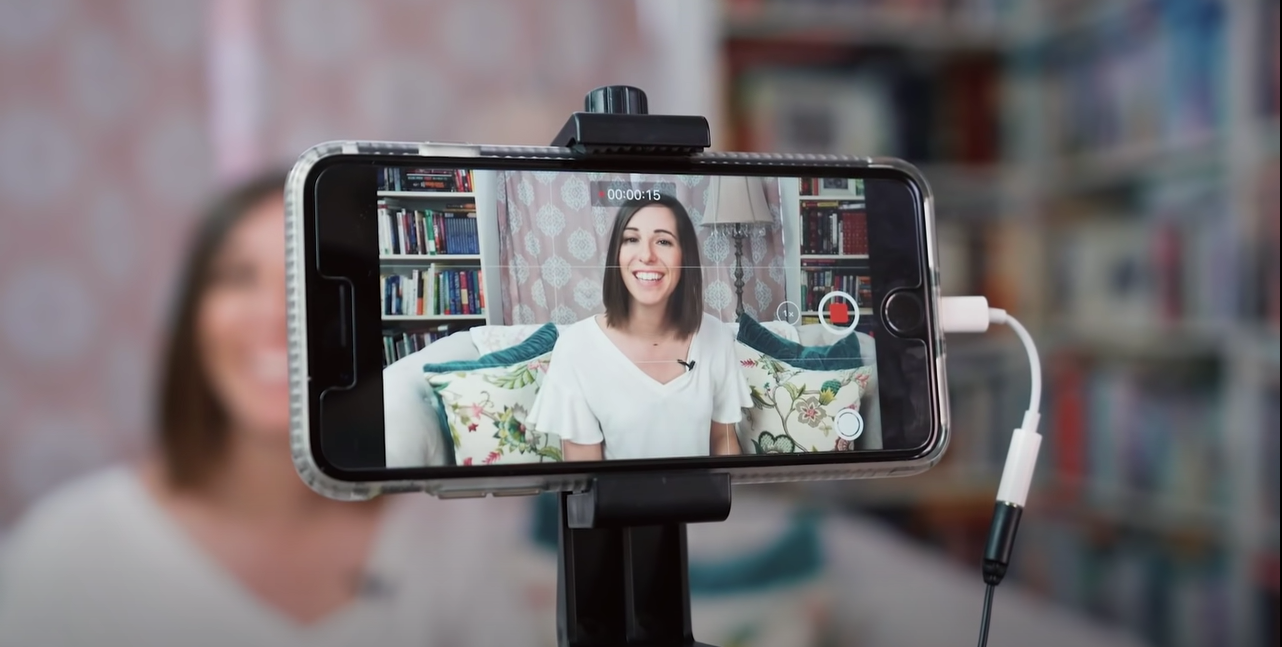
Sabemos que esto podría alarmarte porque bueno, ¡no puedes verte a ti mismo! Pero haz una toma de prueba; siéntate y grábate diciendo algo. De esta manera, puedes captar tu audio y verificar su claridad, así como asegurarte de que el fondo sea estéticamente como deseas.
Consejo práctico: Si aún así eliges usar la cámara para selfies, evita este error común:haz lo mejor que puedas para mirar a la lente de la cámara mientras disparas. , no contigo mismo.
De esta manera, establecerás contacto visual con el espectador.
Paso 4:selecciona la configuración de vídeo en tu teléfono inteligente antes de comenzar a grabar
La mayoría de las cámaras de los teléfonos tienen la opción de utilizar una calidad de 1080p, lo cual es fantástico, pero si puedes utilizar 4k, elige 4k.
¡Ahora está todo listo para entregar su contenido!
Paso 5:entregue su contenido
¡Tu momento de brillar está aquí! ¡Felicitaciones! Ahora sabes todo lo que necesitas sobre cómo hacer un vídeo de YouTube en tu teléfono.
(4) Planificación de tus sesiones
Se requiere mucha planificación cuidadosa para planificar una sesión para crear un video exitoso de YouTube. Mucho antes de que la cámara empiece a grabar, primero debes planificar algunos conceptos básicos. 
Así es como debes planificar tus sesiones:
(A) Guiones y guiones gráficos
Un guión garantiza que entregue su mensaje correctamente y en orden para que sea más fácil editarlo más adelante. También significa que no tienes que memorizar todo lo que tienes que decir y aun así puedes transmitir tu mensaje de manera eficiente.
Aquí tienes un marco de vídeo popular que puedes utilizar:el H.I.C.C. fórmula .

La abreviatura significa:
- Gancho
¿Cómo captas y mantienes la atención del espectador?
A continuación se ofrecen algunos consejos y formatos que puede utilizar para enmarcarlo correctamente:
-Un resumen de lo que aprenderán.
-Un titular pegadizo
-Una imagen sorprendente
-Un adelanto
- Introducción
Introducir el tema; sea breve y revelador.
- Contenido
Este es el tema real de tu vídeo, donde ampliarás el cuerpo de tu contenido.
- Llamado a la acción
Sugiere a tus espectadores que interactúen contigo con Me gusta, comentarios, suscripciones o que vean otro vídeo o te sigan en las redes sociales
Por ejemplo, tomemos el vídeo bien segmentado de Ethan Chlebowski sobre "Cómo hacer panecillos Hoagie adecuados en casa". Utiliza claramente la fórmula HICC para explicar su proceso.
En el gancho , Ethan atrae a los espectadores de inmediato mostrándoles la receta completa y señala que hay muy menos contenido en línea relacionado con ella.
En la introducción parte, se presenta, explica lo que está haciendo y destaca que compartirá mejores formas de cocinar con los espectadores.
Contenido — en esta parte, explica todos los ingredientes, menciona los ingredientes especiales y sus marcas, técnicas y amplía la receta en sí.
Al final del vídeo, hay llamadas a la acción pidiendo a los espectadores que se suscriban, visiten su sitio web y su cuenta de Instagram.
Podemos ver exactamente cuán efectiva es la fórmula HICC en este ejemplo que hemos descrito.
Un guión gráfico, por otro lado, no es más que una combinación del guión y las imágenes correspondientes para cada escena. Aquí tienes una plantilla de guión gráfico sencilla que hemos creado y que puedes utilizar.
(B) Encontrar la ubicación correcta
A menos que estés filmando en un estudio, querrás resolver esto de antemano.
Explora algunas ubicaciones y haz un reconocimiento con tu equipo. Averigua si necesitas permisos para disparar y si hay determinadas horas en las que el lugar es inaccesible.
Asegúrese de incluir los costos de viaje y transporte del equipo, así como también tener en cuenta la posibilidad de un clima impredecible.
Consejo práctico: Independientemente de si vas a filmar en un estudio o en exteriores, visita el lugar el día antes del rodaje para tener una idea del espacio.
De esta manera, podrás incluso hacer algunas tomas de prueba en cuanto a los encuadres o la iluminación planificados.
(C) Haz una lista de tomas y un cronograma de producción
¿Qué escenas estás filmando y a qué hora?
Una lista de planos es el desglose plano por plano de cada escena; incluye detalles específicos de cada toma y es un paso esencial en la planificación de preproducción, especialmente si hay muchas variables.
Una lista de tomas básica debe incluir:
- Número de escena
- Número de disparo
- Ubicación (interior o exterior)
- Descripción de la toma
- Ángulo de cámara, encuadre y movimiento de cámara
- Acción/diálogo
- Sujetos/actores en la escena
- Accesorios necesarios
- Descripción de la toma y notas extra
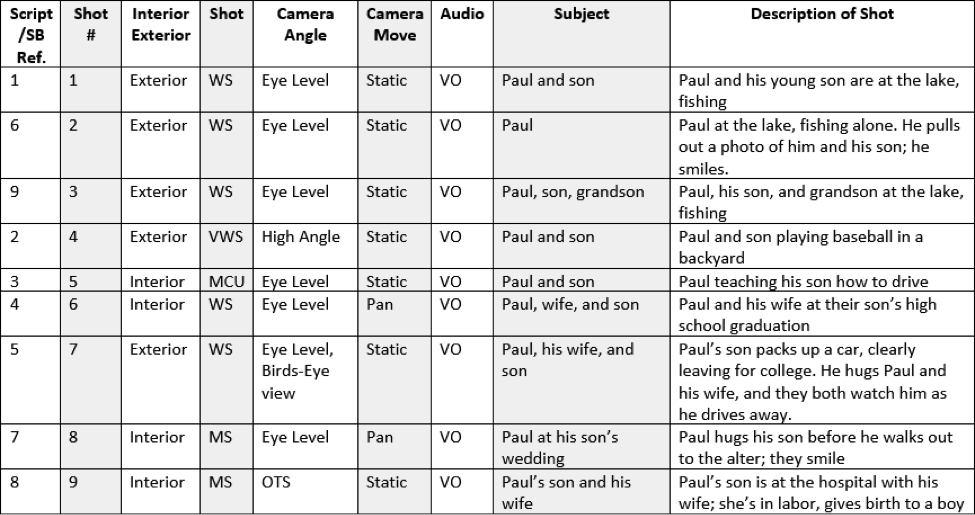
Aquí tienes una plantilla de lista de tomas Puedes descargarlo y usarlo para tu propio vídeo.
Ahora que sus otros fundamentos están planificados, necesita planificar su programa de producción o rodaje. Esta es una herramienta crucial para gestionar las expectativas del elenco y el equipo con respecto al tiempo necesario.
Su cronograma de producción de video debe incluir:
- Ubicación
- Escena/toma
- Equipo
- Se necesitan personas
- Información de contacto
- Fecha y hora
Este documento debe actualizarse periódicamente y compartirse con todo el equipo. He aquí un vistazo a un programa de producción de muestra:
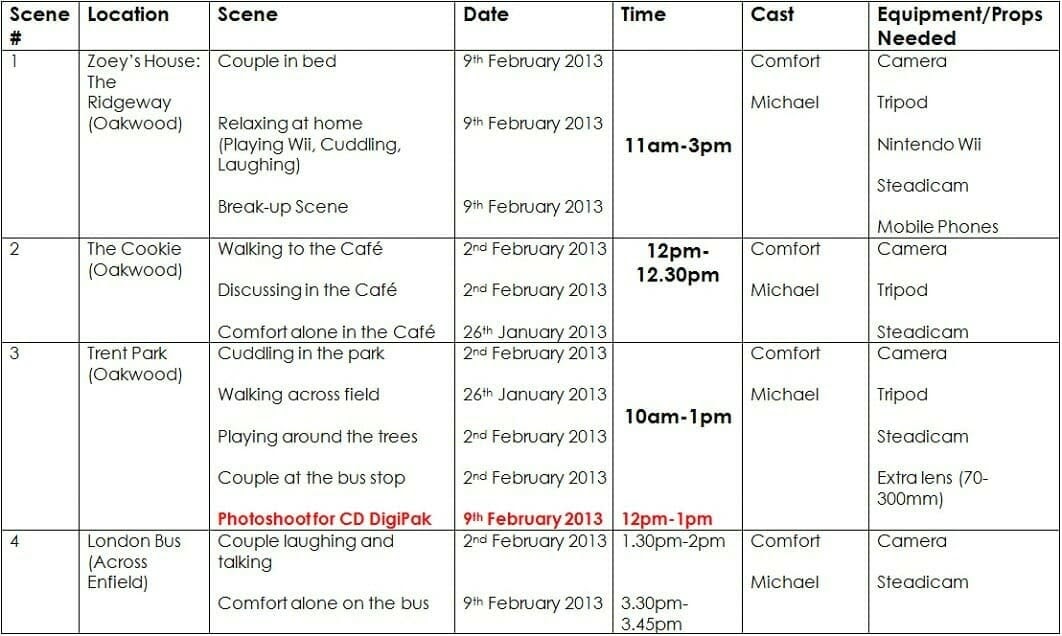
Fuente: Valoso
Aquí tienes una plantilla de cronograma de producción que puedes descargar y usar para tu propio vídeo.
(5) Grabar tu vídeo
Ahora que hemos cubierto la fase de preproducción, es hora de pon la cámara en marcha . A continuación se ofrecen algunos consejos que debe tener en cuenta cuando empiece a disparar:
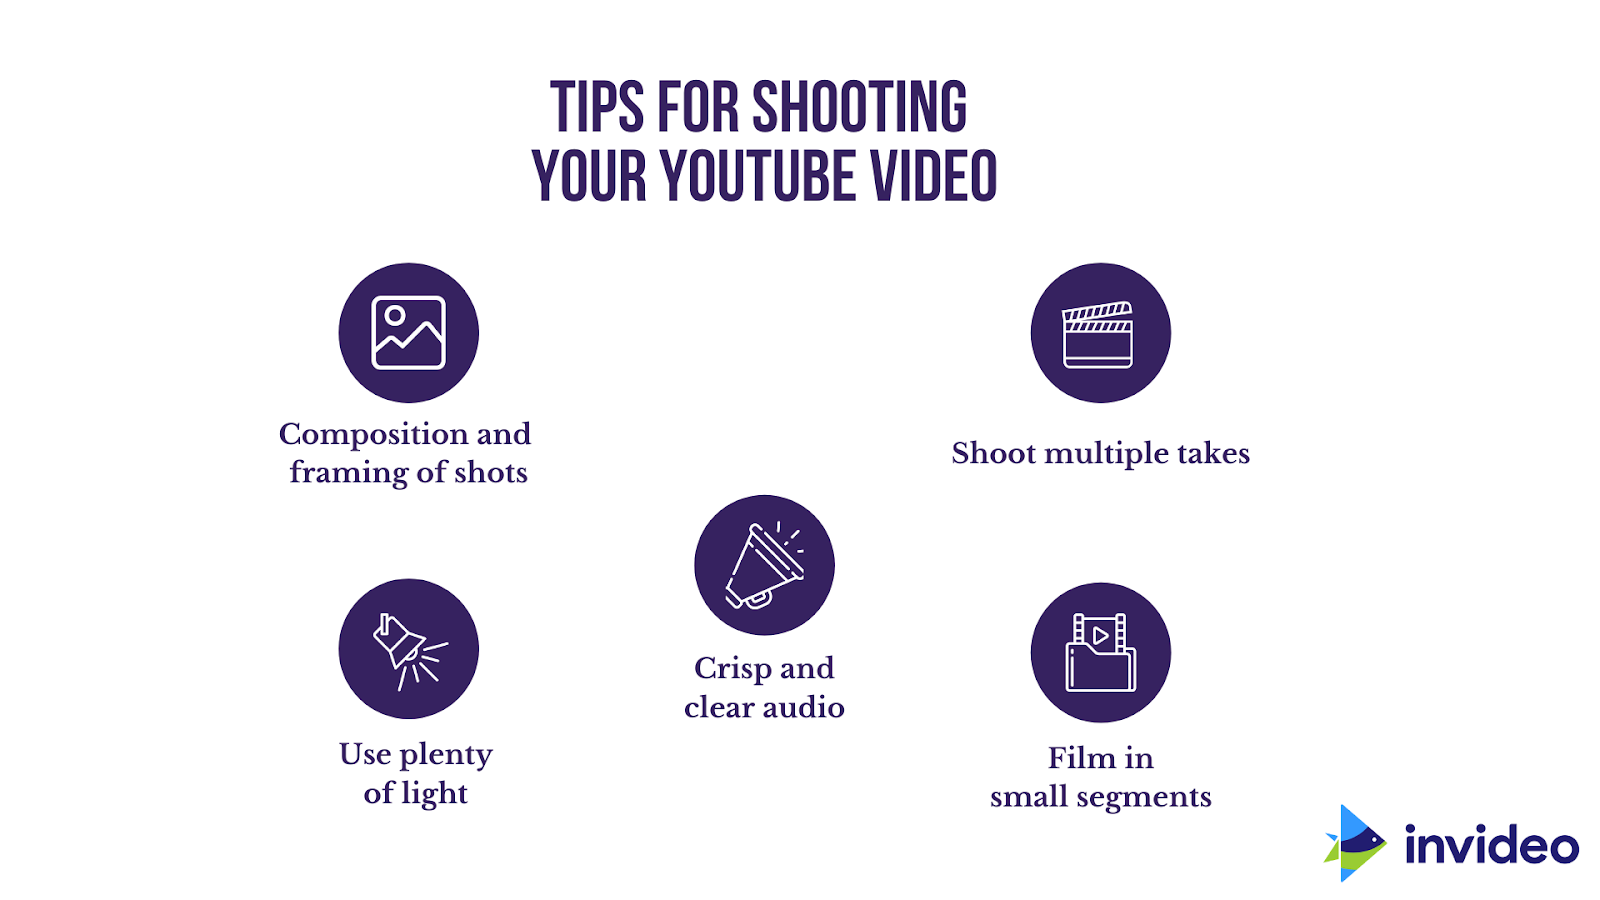
(A) Composition and Framing of Shots
How you compose your frame is a massive part of how you tell your story! The frame composition combines all the elements of the shots, including its lighting, actions, and dialogue, to portray the story and evoke emotion.
The three main types of shots used in YouTube videos are:
- Wide-angle shots — these add context to the shot by emphasising on the location or background of the video.
- Medium shots —these are great for connecting one part of your footage to another.
- Close-up shots — these are useful for emphasising certain elements you want to highlight and clearly communicate a point
Here’s a video that will take you through the basic camera angles:
We’ve put together a few tips to best film these shots from expert filmmakers. Here’s what they suggest:
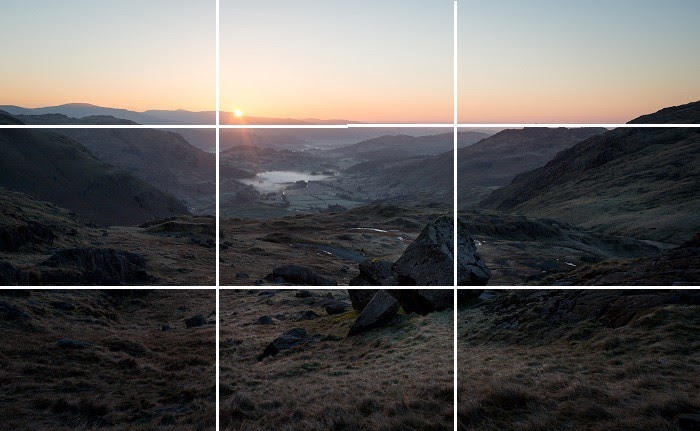
- Use the Rule of Thirds
This means dividing your frame into thirds both vertically and horizontally and putting your subject on one of the intersections. This helps balance your image for an interesting composition.
- Create Depth in the Frame
Set the focus off-center in the shot, and away from the background. This will create depth in the frame.
Using different lens focuses and positioning objects at different lengths from the camera will make the scene look bigger and make for a more interesting frame.
- Observe the Location
This is something that you should ideally start doing in the pre-production phase when you go location scouting. By observing the location carefully and pinpointing what you want to highlight, you ensure your shot has sound aesthetics which are in line with your content.
(B) Plenty of Light
Even if your video is great in every other way, if your lighting is too dark, too bright, or looks amateurish, it’s going to put viewers off; so don’t depend on just “fixing it in post”.
Lighting makes a big difference to the quality of your YouTube video, so prioritise your planning lighting during pre-production and executing it properly when you’re filming.
Here’s a breakdown of the types of lighting, their respective sources, advantages, and disadvantages:
| Type of Lighting | Source | Ventajas | Disadvantages |
| Natural Lighting | Outdoors (the sky, the sun, or the moon) and can be used with diffusers and reflectors |
|
|
| Artificial Lighting | Usually indoors (Direct lighting from electric bulbs) |
|
|
Power tip: Regardless of where you’re shooting, make sure that your primary light source is even and consistent.
If you are using natural lighting —
- Try and film in the morning or evening, when the light is flattering, and not as harsh as it is midday.
- You can use diffusers and reflectors to soften the lighting and shadows.
- If you do have to shoot midday, try and choose a day when it is cloudy or find an area with shade.
If you are using artificial lighting —
- Avoid ‘spotlighting’ your subject in direct pools of light. Avoid overhead lighting as well as it causes unflattering shadows.
- Using little or no shadows is best for marketing videos, and it creates a more open and approachable vibe.
- Below, you’ll find a few techniques which can be used to achieve specific effects. For marketing videos , we suggest you go with the far-right option .
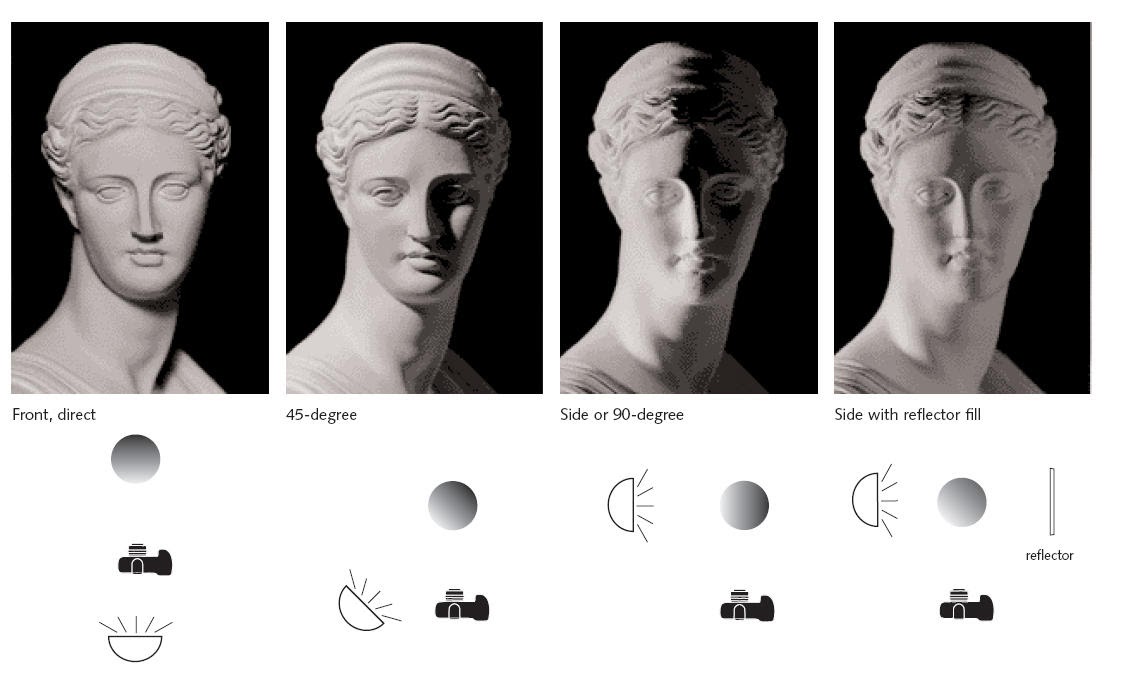
Source: Wordstream
- Here’s a YouTube Creator Academy video on effective lighting for a high-quality video:
(C) Crisp and Clear Audio
One of the easiest ways to lose viewers by having them hit the ‘back’ button? Low-quality audio.
Again, don’t depend on fixing everything in post-production; here are some pre-emptive steps you can take for crisp and clear audio output that can take your video to the next level:
Avoid Using your Camera Mic
Make Sure You Invest in a Good Microphone
We understand that YouTubers you are just starting out might not be able to invest a lot in equipment right away.
So we’ve done the legwork here, and put together a few budget options:
(i) The Fifine condenser K669B USB microphone at under $40 . We suggest you pair this mic mount with it for stability.
(ii) The SGC-598 Photography Interview Shotgun MIC Microphone for Nikon Canon DSLR Camera for under $40 .
(iii) The compact and easy-to-use Blue Yeti USB Microphone for under $150 .
(iv) The handy and portable Zoom H1n Digital Recorder for under $150.
-
Check the Acoustics of the Shoot Location
Before the camera starts rolling, check the acoustics of the location. Check if there is an echo; and if there is, try and shoot somewhere else. Be aware of any background noise that your microphone might be picking up, too.
A lot of audio issues can indeed be fixed in post-production, but they can be difficult to get rid of completely.
So make sure you bear the acoustics of your location in mind when you’re scouting for places, regardless of whether they are indoors or outdoors. It will save a lot of time and effort later.
-
Position your Audio Equipment Properly
Make sure you put your microphone as close to the subject as possible so that your audio is crisp and clear. Consider using a pop filter to get rid of crackles and blips on the recording.
(D) Film in Small Segments
Segmenting your script into smaller takes will make your job much easier both while shooting, as well as during editing. It also lends a certain level of flexibility to post-production with easy-to-use clips.
-
Shoot Multiple Takes
Even the best of filmmakers mess up sometimes, so make sure you take multiple takes of each scene to give yourself more shot options in the editing process. Even if your first take seems to have gone perfectly, get another one, just in case.
-
Shoot from a Variety of Angles
Try and get shots from a variety of angles so you can choose the shots you think work best in the post-production phase.
-
Shoot B-roll Footage
B Roll or background footage is a great way to make your video more interesting and add a variety of visuals. If you plan when you’re going to use B rolls in advance, you’ll be doing yourself a favour by saving a lot of time later on.
(6) How To Edit A YouTube Video
If you’re looking to create videos of up to 15 mins, the easiest option at your disposal is InVideo — a one-stop shop for video creators. It comes with:
– 4000+ pre-built templates that you can readily use or you can start with a blank canvas.
– An in-built media library of 8M+ royalty-free video clips, images, and music from premium sources like iStock and Shutterstock.
– A super intuitive and easy to use video editor that’ll allow you to edit your videos in mins even if you’ve never edited a video before
– 24*7 live chat support so you can always ask for help
The best part — it’s completely free for you to start with and you can create as many videos as you’d like with your own brand logo/watermark and export them in 720p. And If you’d like to get your videos out in 1080p, as well as get access to the premium media library, it’ll just set you back by $20/month or $120/year.
Edit your YouTube videos like a pro
Use InVideo’s customizable templates
Create now
If you want to know more about how to use InVideo and get started today, check out this tutorial.
If you are looking to create videos that are longer such as vlogs, you’d be much better off using a traditional editor like Adobe Premiere Pro. Here’s a tutorial that’ll help you get started on the basics of Premiere Pro.
(7) Uploading Your Video to YouTube
You can either upload a YouTube video from your web browser on your desktop/laptop, or from the YouTube app on your Android/iOS device.
You can follow the simple steps in this article to get upload your video and running on YouTube.
(8) Optimis ing for YouTube SEO
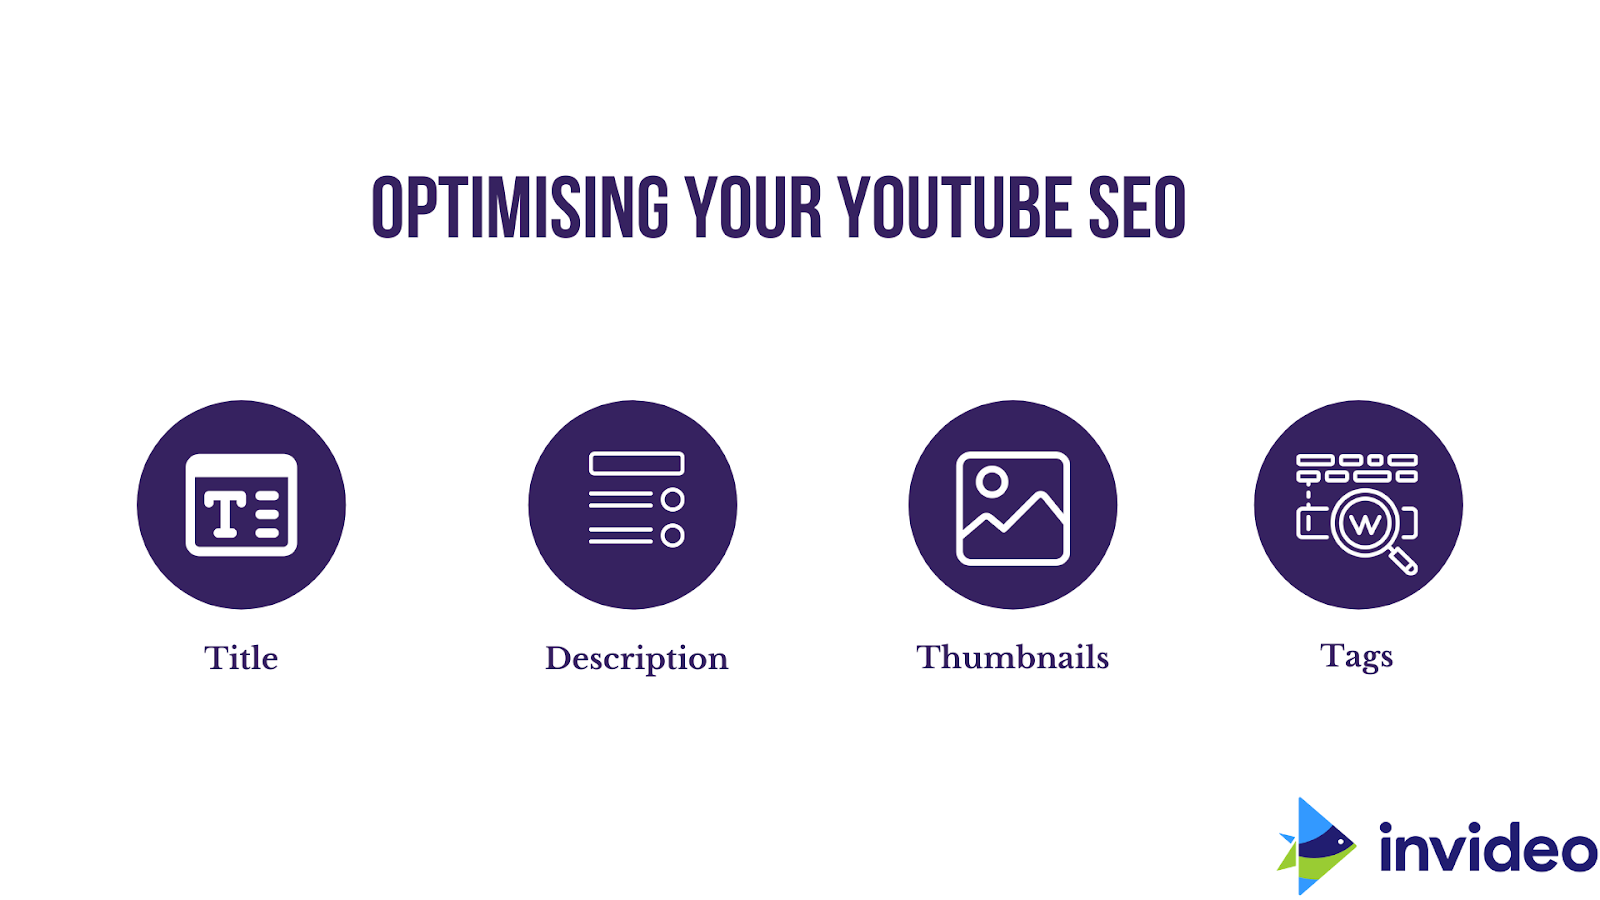
Here are the best YouTube SEO practices that you can follow to work with the YouTube algorithm and generate more views and subscribers for your channel:
( A) Title
Here are a few steps to craft searchable and clickable video titles, according to YouTube:
SEO Tip 1: Keep your titles under 60 characters
YouTube suggests that you keep your titles concise and that you front-load the most important information. Titles of a certain character limit also ensure that your title isn’t cut off.
Why is this a benchmark practice? A title that’s truncated or cut off would lead to your intended audience simply scrolling past the video after just reading the part of the title that’s visible on their feed.
Power tip: If there’s absolutely no way to shorten your titles to anything less than 70 characters, ensure that the most interesting or compelling part of your title fits in the bit that’s visible; the part that is shortened should be essentially harmless to your SEO appeal.
You’ll see what we mean in the video below:
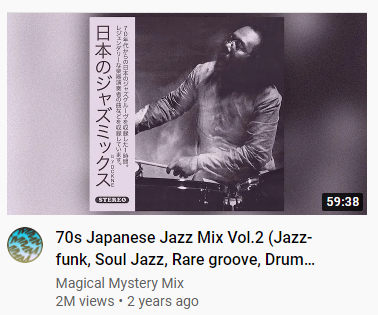
You would ideally still go for this video since the compelling aspect of the video (i.e the genres of music that are included) is made amply clear to the user.
SEO Tip 2: Use your keyword in the title
YouTube’s advice to do with keywords is to use the most relevant search terms in your titles and descriptions— provided they’re accurate.
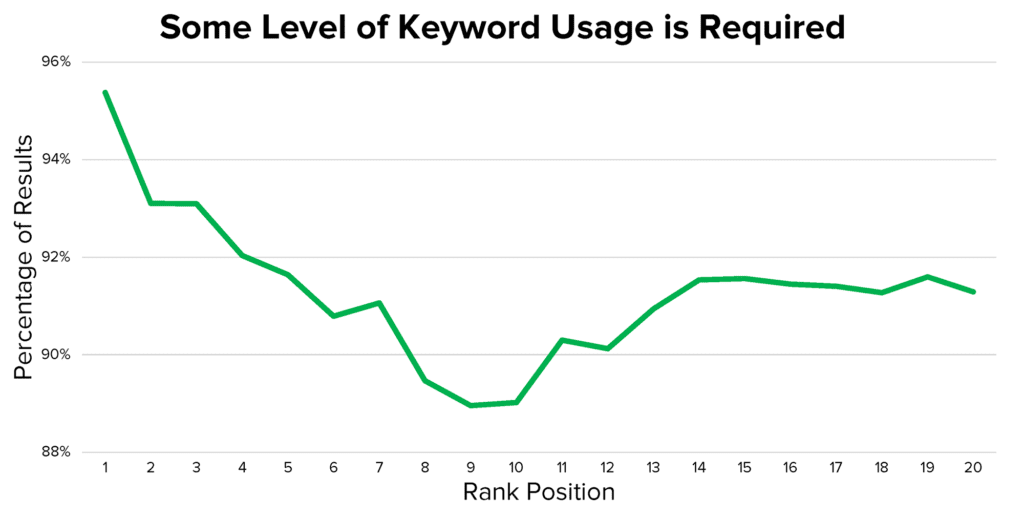
Briggsby’s study confirms the benefit of having your target keyword in your title; it found that more than 90% of top-ranking videos at least partially include a target keyword in their title.
SEO Tip 3:Write catchy titles that highlight a benefit
If you were to create a tutorial on origami, a keyword-rich title might be, “how to fold paper for dummies.” But that’s boring, isn’t it?
There are better approaches you could take that evoke curiosity:
- How to make origami with recycled paper
- How to make origami birds with high speeds
- My 6‑year-old niece teaches you how to make an origami bird
The point is that titles that directly offer the viewers the benefits that they can get from watching the video are more likely to stand out in a competitive landscape.
SEO Tip 4:Create a thumbnail that complements your title
Thumbnails are usually the first thing the viewer looks at before clicking through to a video. If you ask us, this is the hardest bit to get right consistently.
More on this coming up shortly in the next few subsections, but this is a great opportunity to get creative.
You can use your imagination and speak power to the truth. Here’s a thumbnail from a video, “How long does it take to rank on Google:”

And if you’re stuck, try and get ideas from Google images or stock photos. A search on Adobe Stock for the word, “system,” shows these photos.
SEO Tip 5:Use Title Ideas That Work
There are certain tried-and-tested key title styles which you can use as a content creator that can help your video go viral.
Some of the most-used title styles are:
- The ‘Vs.’ Title
A comparison of two or more products, ideas, etc. Some examples of this type of video include:iPhone 11 Vs. iPhone 12, Canon Vs. Sony and Trump’s immigration policy Vs. Biden’s immigration policy.
- ‘How to’ Titles
Almost 65% of people on Youtube last year used it to search for solutions. The ‘How to’ titles can be used for any of the videos that helps people find solutions — such as ‘how to change a tyre’ and ‘how to make cream cheese’.
- Mistakes Title Formula
‘Mistakes to avoid’ videos are among the most popular on Youtube; examples include ‘5 mistakes people make while tying a tie’, ‘5 mistakes to avoid while changing a tyre’, and ‘Mistakes to avoid while making cream cheese’.
The most successful YouTube content creators use a combination of the most popular title formulae to ensure that their videos continue to get views and appear in searches long after they have been uploaded.
( B) Description
Now that you have your title for the video, let us explore some of the best practices around crafting your YouTube video descriptions.
-
Find related keywords
You can do this via TubeBuddy’s Chrome extension. He aquí cómo:
-
Use a keyword research tool
You can use an external tool like Ahrefs as well. He aquí cómo:
Coming up next — we have thumbnails!
(C) Thumbnail
Think of thumbnails as your digital billboard for your video — they are the first thing viewers will notice and need to convey key information about the video to get more views on YouTube.
Let’s cut to the fundamentals of optimising your video thumbnails to increase YouTube views:
- Specifications:1280 x 720 pixels
- Aspect Ratio:16:9 ratio
- Format:.JPG, .GIF, .BMP, or .PNG.
- Size:Under 2MB limit
Here are a few best practices you can follow to grow your YouTube channel :
Consider increasing the brightness, saturation, and contrast of the image to make it stand out amongst other thumbnails, and make sure you zoom in and out of it to make sure it looks good in all sizes.
Coming to the colours you can use to make your thumbnail pop…
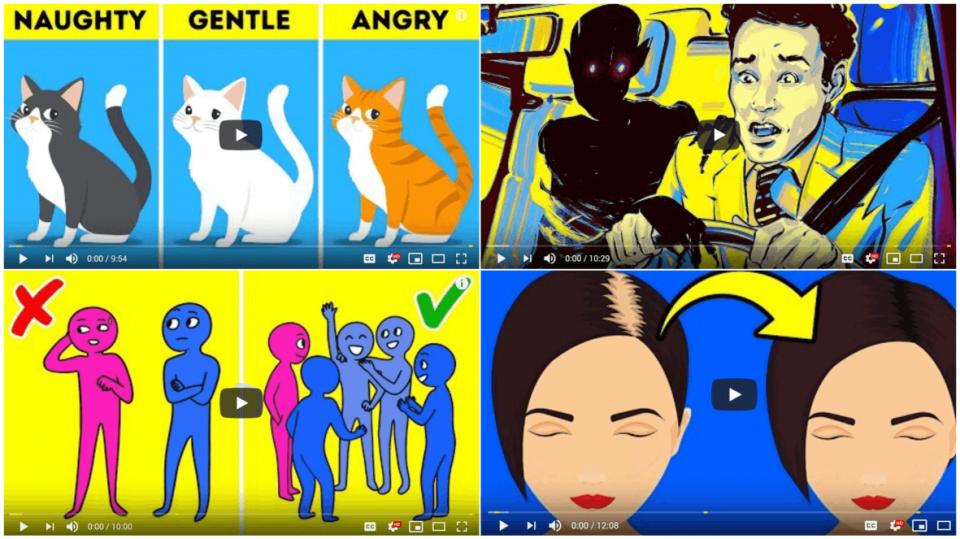
BOGY thumbnails use these colours:
- Azul
- Orange
- Green
- Yellow
As you know, YouTube’s colours are red, black, and white. So what happens when you use the same three colours in your video thumbnails?
You got it:they blend right in! Notice how your eye just glides over the image?
On the other hand, when you use BOGY colours:
It’s easy to see why viewers or potential viewers would be more likely to click on these, right?
Here’s another example:
The Bright Side Channel — which boasts on 30 million subscribers — mostly uses blue, orange, yellow, and purple in their thumbnails.
Of course, you can use red, black, and white occasionally; just make sure BOGY thumbnails dominate your feed for the most part!
Thumbnails that clearly show people’s faces receive a higher click-through rate on average than those that do not.
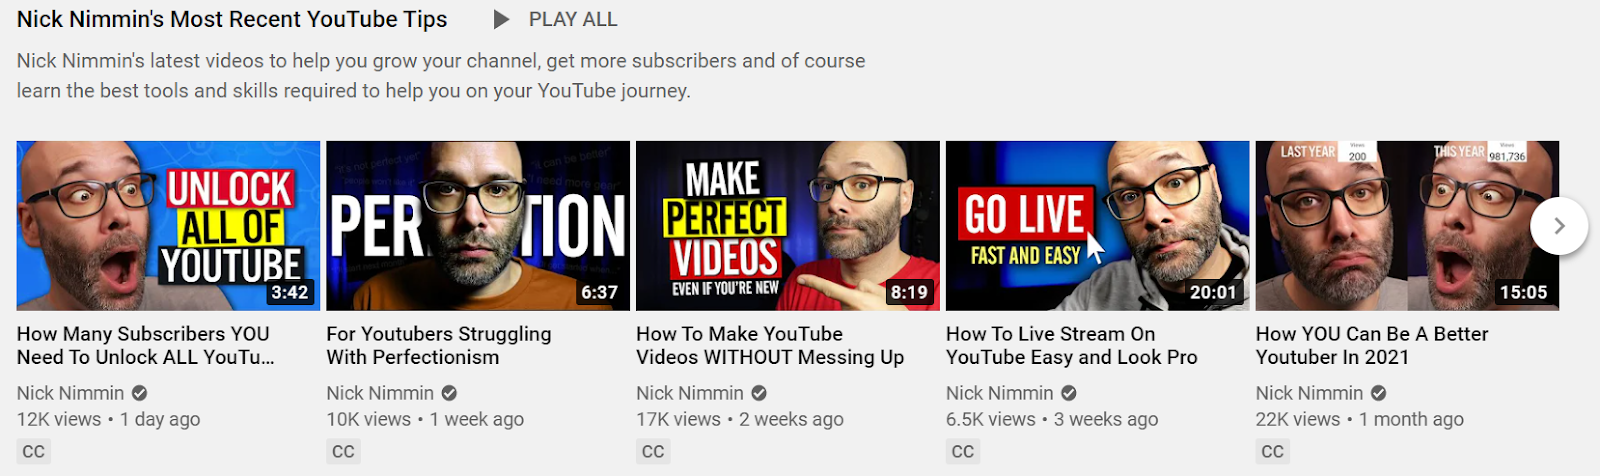
Try to feature a human face in your thumbnails, and make sure they are big enough and clear enough to convey a story or emotion.
This brings us to the 3E’s —
Eyes
Make sure you are making eye contact with the camera/ By making that virtual eye contact with your audience, you’ll be best placed to catch their eye and get their attention.
Emotions
For someone scrolling through a feed, something that shows or even evokes emotion is the one that makes them stop scrolling.

Your expressions need to be loud, the other visuals should be kept simple with minimum content on the thumbnail (not more than 2-3 words, ideally).
Excitement
If you look excited in your thumbnail, it’s more likely that you will evoke excitement in your viewer!
Don’t be afraid to get whacky with your expressions — in fact, it’s an inside joke that that’s exactly what successful YouTubers do to stand out.
If you’re using a font for the text, make sure it’s clear and easy to read, even from afar . It’s also worth checking whether the style of the font matches with the query you’re trying to address in the video.
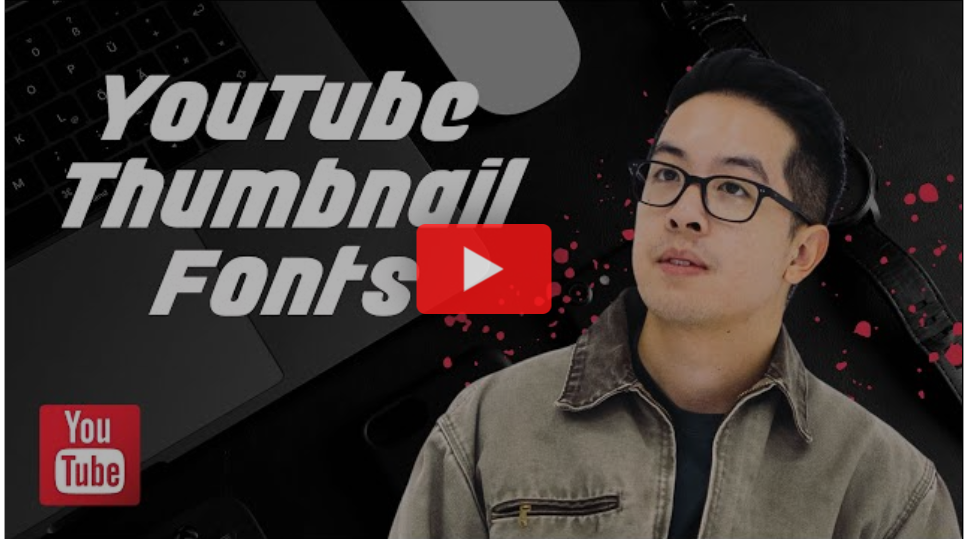
You can use Snappa to access a library of YouTube fonts for free and create great thumbnails with pre-designed templates!
Try not to put more than 2-3 words in the thumbnail — this content should function as the perfect teaser to draw the audience in.
Power tip — address the community that is your target audience. For example, if you’re making it for new mothers, use ‘new moms’ in the text in the thumbnail. Nick Nimmin, for instance, oftens refers to his viewer as ‘YouTubers’ — it’s a smart way to both identify and reach out to your audience.
Lastly, remember to keep it simple and don’t stress about it too much!
To create quick and easy thumbnails without using complicated applications like photoshop, you can use the thumbnail generator on TubeBuddy or VidiQ. Their thumbnail generators let you choose a still from the video or upload an image, to which you can add text, your logo, and other images.
(D) Tag s
The only thing that is left now for us to cover to do with optimisation is adding relevant tags which include keywords to your video while uploading . Tags let people discover your content on YouTube; they are the best way to let search engines know what your content provides, so it can match it to the viewer’s expectations.
While YouTube does not have its keyword search tool, there are many third-party tools like VIDIQ, TubeBuddy, Ahrefs Keyword Explorer that can help you identify the right tags and keywords for your video. You can also make a note of relevant tags that you come across while searching for keywords to add to your title.
You can use the same keywords you found out for the description as tags.
¡Felicitaciones! You have now learnt how to make a YouTube video as well as how to upload and optimise it. It’s now time to put the word out about it.
(9) Promot ing Your YouTube Videos
After having optimised the title, thumbnail, and description to boost views for your video, you need to amplify your video’s discoverability .
Here are ten ways to promote your videos outside the platform:
(A) Add Transcripts Or Closed Captions
YouTube does have an option to generate automatic captions but they are not generally very accurate. However, you can upload your own transcript.
Here’s how to add subtitles to YouTube videos:
Remember we mentioned YouTube Studio is a great way to generate traffic?
YouTube SEO gurus often advise that closed captions work best for boosting your video’s SEO rankings and traffic as they are crawlable by search engines. They also help make your videos more accessible,
(B) Add Cards
YouTube cards are interactive elements that you can place during or at the end of your YouTube video. These cards appear as a notification on the top right-hand corner of the screen while your video is streaming.
You can place these cards to appear at any given point in time during the video. When your audience clicks on the card, it will expand on the video’s right-hand side to showcase links to other videos, webpages, or playlists.
The card will disappear after a few seconds if the user does not click on it. These interactive cards work on both computers and mobile devices and are used to redirect your viewer to other content on your channel or an associated channel, call out to subscribe, or even conduct a poll. You can have up to 5 cards per video and there are a variety of card types like merchandise, fundraising, video, etc.
Check out this article to find out the exact steps you can follow to add YouTube cards for your videos.
(C) Add An End Screen
End screens are used to direct viewers to more content on your channel by placing a clickable card at the end of your videos (usually the last 5-10 seconds). This not only increases your channel’s watch-time but is also known to be a great way to cash in on new subscribers.
End screens can be viewed on both the desktop and mobile and you can add up to four elements. You can direct viewers to another relevant video, a playlist, an associated channel, and even call out for a subscription to your channel.
We’ve done you a solid and put together all the guidelines for making a YouTube end screen right here:
| Parameter | Guideline |
| Length | 25 Seconds |
| Screen Dimension | 1280 x 720 |
| End Screen Length | 5 – 20 Seconds |
| Subscribe Button Dimension | 294 x 294 |
| Video/Playlist Space | 615 x 345 |
| Link Square | 294 x 294 |
| Elements Per Screen | 4 Elements |
Here’s an article that is a one-stop-shop for all things to do with YouTube end screens.
(D) Create Playlists
A playlist is a set of videos that are organised by topic or theme and show up in the videos section of YouTube. It makes it easier for businesses to club relevant content together for easy consumption and it also makes it easier for viewers to find the right content for them on new channels.
Playlists are also a great way to increase watch-time because when you click on the playlist, it will automatically play the consecutive videos on the list. They also rank for SEO if you use the right keywords.
For example, if you made a video about speed reading. When tagged alone, this will only show up as a result of its keyword. However, if it is clubbed in a playlist called ‘Productivity Hacks’ it will rank for multiple keywords and will give YouTube a better understanding of your video.
You can follow these steps to create a playlist:
- Find a video you want in the playlist.
- Under the video, click Save .
- Select a playlist such as Watch later, or a playlist you’ve already created, or click Create a new playlist .
- If you create a playlist, enter a playlist name.
- Use the drop-down box to select your playlist’s privacy setting. If it’s private, only you can view the playlist.
- Click Create .
(E) Encourage Conversations In The Comments Sections
What is a better way to show YouTube that your audience is engaged than having them connect with you in the comments section?
If viewers are responding to the video with likes and comments, YouTube is more likely to promote it.
Here’s a simple trick to increase engagement and keep the conversation going. When you receive a comment saying “great stuff. Really helpful!”, don’t reply with a simple, conversation-killing thank you. Instead, engage in a conversation with the viewer. You can ask him what was the most useful insight he got from the video or if he would like to recommend a topic for the next video; this keeps the conversation going and increases engagement and ranking.
Pinned Comments are another way to interact with your viewer. You can redirect them to another video on your channel or ask them a question to drive engagement.
(F) Redirect Traffic From Other Channels
YouTube will prioritise content that gets views from other channels onto its channel. When it sees traffic coming from your social media pages, website, or other channels on the internet, it adds credibility to the video and increases engagement.
Here’s how you can redirect traffic from other channels to YouTube:
Step 1:Create Backlinks
In simple terms, backlinks are just links from a page on one website to another. If another website links to your video, then you have a backlink from them.
Backlinking can add to the credibility and value of your content in three ways:
- Rankings — The more links your videos have, the more likely they are to rank in search engines for relevant search queries.
- Discoverability — Since search engines find new content by revisiting pages to check for new links — especially the popular ones — they might discover your content faster if you get backlinks from popular pages.
To increase backlinks and add to your amplifying efforts, make sure you post on multiple platforms which can include your website, blog, Reddit, Quora, and even guest posting on other blogs that your video can add value to. The more backlinks you are able to create, the better your SEO for YouTube
Step 2:Promote On Social Media
You can leverage your community on social media as well as find many existing communities on social media sites like Facebook groups, Reddit, Twitter, and Instagram that match your interests. When people feel a sense of belonging, they engage with the content more; this results in getting more views on YouTube.
The reason YouTube rewards traffic from social media is simple — because you are bringing people from other social media platforms to YouTube.
Take time to interact with other members of the community, and make sure you write a simple 2-line description of why the fellow members might find that video interesting.
We understand that not everyone has 100K+ followers on Facebook or a verified Instagram, but there are ways to promote your YouTube videos even if you don’t have an audience yet.
(G) How to Promote Your YouTube Videos If You Don’t Have An Audience Yet
Step 1:Leverage communities on Quora and Reddit
El proceso es sencillo. Find a pre-existing thread where someone has asked a question or started a discussion most relevant to your video. Type in the best answer you can give and then link your YouTube video at the end to support your answer.
Step 2:Collaborate and interact with other YouTubers
Collaborating with other channels and creators regardless of the channel size can really be useful for putting yourself out there. If your content is on five other channels, that’s five other channels’ viewership that’s going to watch your content.
All you have to do is take that first step to reach out to other YouTubers that you want to collaborate with.
It’s also no secret that influencer marketing has been blowing up in recent times. The audiences that these influencers, with a large following, have are exposed to a brand’s content the minute they share them, making it possible for that content to even go viral — a content creator’s dream come true!
Just one share by the right influencer can change the game and generate a lot of views — Unamo Social Media is a great place to identify influencers within your sphere of interest and reach out to them to promote your YouTube content.
You can also pitch ideas to a brand, influencers, or a business that manufacturers ancillary products and create content with them to reach out to a larger audience.
Step 3:Pay for YouTube Ads
If you want to reach more people on YouTube, you can pay for it with YouTube ads. YouTube ads let you target keywords, interest and you can create custom audiences too.
Before you launch your ad campaign, it’s important to define the audience you want to reach. You have four main spheres of targeting options:
- Who. Try choosing specific or niche audiences based on demographics, language, and interests. For example, you could target 18-34-year-old female “cooking enthusiasts” who subscribe to food channels and watch culinary videos.
- What. It can help to select from topics that are most relevant to your channel. You can use contextual targeting to reach viewers searching for specific content. Or choose the video or channel on which you want your ads to be shown.
- Where. Define the location of your audience—country, region, city, or postal code. You can even define a custom location by radius or place of interest.
- When. Decide how often your ads are shown and on which devices. If you have a limited budget, you can pace the delivery of your ads throughout the day.
You should set up search ads based on your main keyword with the intent to get the paid viewers to subscribe to your channel. Your new subscribers will be notified every time you put up content, without having you pay for it again.
(H) Leverage YouTube’s Analytics
Nothing like creating relevant and high-quality content for your audience to make your YouTube channel grow faster.
To do this, it is essential to pay attention to YouTube’s analytics and identify what content resonates with your audience. The insights you can draw from studying the watch-time, CTRs, how many followers you gained per video, etc. can help you understand what kind of content works, and what doesn’t.
You can also go through the comments of your YouTube video where you will get insights into the need-gaps of your audience and how you can create content that brings them value and helps them.
Read our guide to understand YouTube metrics for beginners.
(I) Use the Right Tools to Create Valuable Content
As a content creator and YouTuber, you need to be in the know about tools so you can stay at the top of your game.
There are many third-party tools that have cropped up to help creators manoeuvre day-to-day tasks like creating thumbnails, finding keywords, and studying analytics. We’ve listed down some of the best tools we know of that are used by popular creators in the industry to help you get started today.
Youtube Essentials — The Complete Toolkit
(J) Repurpose Your YouTube Videos and Promote Them Across Social Media Channels
Get this:A single 10 minute YouTube video can produce at least 3 snackable videos, a promo, and a blog post, which can help you catch eyeballs across platforms and redirect them to the main video.
Most social media platforms let you share videos and some of them like Instagram and Twitter are now also becoming hotspots for viewing this form of content. You can also embed your video on your websites and drive traffic from online communities.
Many content creators aren’t aware of how to go about this process. What if we told you that — in just a matter of minutes — you could repurpose your YouTube video to create snackable videos and promos, without burning a hole in your pocket?
Use InVideo, the online video editing tool that is slowly becoming a favorite amongst marketers, to repurpose your YouTube video into clickable and easy-to-consume content for social media.
He aquí cómo:
-
Create Promos
Create a teaser or a sneak peek into your YouTube video that can be shared on social media as well as on your YouTube channel to create a buzz about an upcoming release.
Use this template to create your own video
-
Create Snackable Videos
Create simple and engaging snackable videos that are not only easy to consume — but also gives the viewer quick and actionable insights. You can also use these videos to pique the audience’s interest and redirect to watch the full video on YouTube.
Use this template to create your own video
-
Create Quote Videos
Choose an interesting quote from the video and turn it into an interactive video to share with your audience.
Use this template for your video
Conclusion
You’re all set to plan for, shoot and edit a high-quality YouTube video! Plus now you have all the actionable insights and information you need to promote it, as well.
We’d love to help you with your questions, so drop them in the comments below. Also, if you did find this guide helpful, please feel free to share them with your friends who are also looking to create YouTube videos.