Camtasia es un programa de edición de video popular y rico en funciones. Esta página le brindará una descripción completa de Camtasia en términos de precio, interfaz, funciones, etc.
Revisión de Camtasia
Camtasia es un software de edición de video multifuncional y fácil de aprender lanzado por TechSmith Company de los Estados Unidos. Se puede usar para editar videos, editar audio, agregar narraciones, anotaciones clave, crear menús, grabar PPT, grabar pantallas de computadora, reproducir videos, etc.
En términos generales, es difícil dar consideración tanto a las funciones ricas como a las operaciones simples. Pero Camtasia lo hizo, lo que sorprendió a muchos usuarios. No hay muchas barras de menú en la interfaz, pero están muy refinadas, lo cual es muy conveniente para que encuentres las funciones que necesitas. Le permite cortar videoclips, agregar efectos de transición, hacer zoom en imágenes locales, ilustraciones o agregar efectos de imagen en imagen y más. Al mismo tiempo, sus formatos de salida incluyen MP4, AVI, WMV, M4V, CAMV, MOV, RM, animación GIF y muchos otros formatos comunes, que pueden considerarse un excelente programa para hacer presentaciones de video.
Más reseñas recientes :Reseña de LumaFusion, Reseña de VideoPad, Reseña de iMovie
(Pantalla parpadea al abrir el programa)
Pros y Contras
Camtasia es un excelente punto de partida para los nuevos editores. También es una gran pieza de software para grabar, hacer screencasting y proyectar tutoriales.
PROS
- El flujo de trabajo es simple y fácil de comenzar para los recién llegados.
- Un sitio web de tutoriales dedicado (https://www.techsmith.com/learn/tutorials/camtasia/) está disponible para que los usuarios aprendan en cualquier momento.
- Admite la vinculación de imágenes y videoclips en muchos formatos a películas.
- Luego, el proceso de grabación de pantalla se puede pausar y reiniciar en cualquier momento para reducir el tiempo de edición posterior.
- El servicio de atención al cliente receptivo mejora su experiencia.
- Resolución de hasta 4K.
CONTRAS
- Es relativamente costoso y requiere costos adicionales de actualización de software.
- A veces habrá un bloqueo en el proceso de grabación.
- Marca de agua (versión gratuita).
Precio
Aunque Camtasia es un software pago, los usuarios pueden tener un período de prueba gratuito de 30 días. Esto le da mucho tiempo para pensar si quiere gastar $299.99 en él.

Lista de precios de Camtasia
Cómo obtener Camtasia
Ingrese al sitio web oficial de Camtasia para descargar directamente y evitar la invasión de software incluido o software antivirus.
Enlace al sitio web oficial:https://www.techsmith.com/video-editor.html
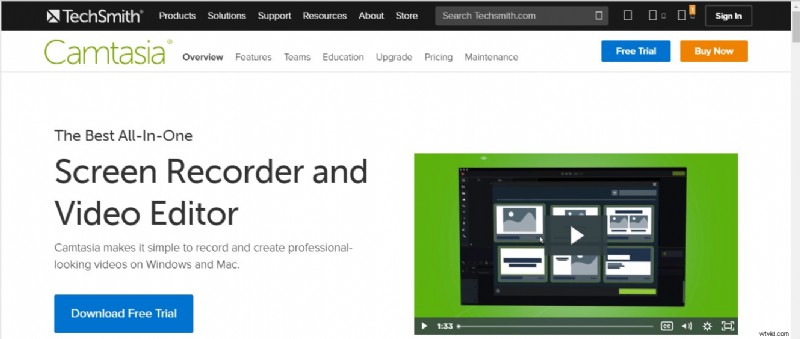
Descargar Camtasia
Interfaz principal
Cuando ingresa a la interfaz principal de Camtasia, lo reciben cuatro grandes paneles divididos:la barra de herramientas, la ventana de vista previa del video, la barra de herramientas de propiedades y el panel de línea de tiempo.
Cuatro vistas de partición de la interfaz principal.
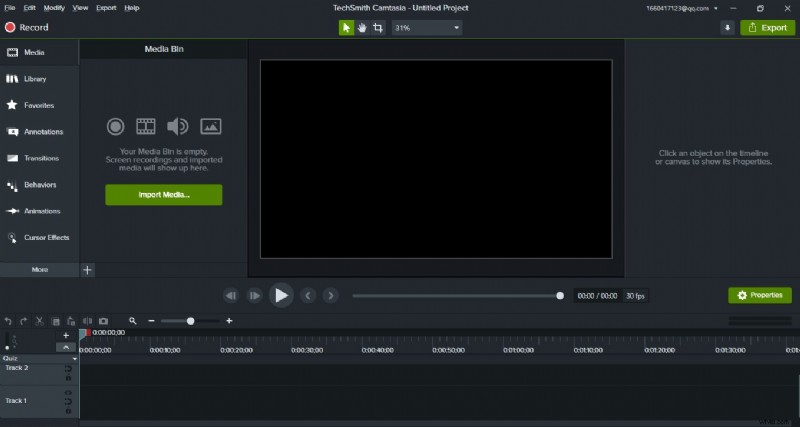
Interfaz principal de Camtasia
Barra de herramientas
La barra de herramientas es, como sugiere su nombre, un resumen de todos los botones de función que se utilizan en el proceso de edición de vídeo. Podemos ver que esta sección también se divide en dos partes. A la izquierda está la lista de funciones y a la derecha está el área de visualización. Camtasia ha dividido todas las funciones en 13 categorías:
- Medios :coloque todos los materiales importados, incluidos audio, video, materiales PPT, etc. Puede cambiar el diseño del material ajustando el ícono pequeño en la parte inferior derecha.
- Biblioteca :La animación y el logotipo de Camtasia son fáciles de obtener para los usuarios.
- Favoritos :recopile anotaciones o efectos haciendo clic en el icono de estrella.
- Anotaciones :agregue anotaciones e identificación de formas al video o cree un efecto de mosaico ajustando el color y el desenfoque.
- Transiciones :agregue efectos de transición para que cada cuadro sea más natural.
- Comportamientos :se utiliza principalmente para agregar efectos de animación a texto o video.
- Animaciones :ajusta los efectos de hacer zoom, trasladar, rotar o inclinar la imagen de video.
- Efectos de cursor :agregue un cursor al mouse para resaltar el seguimiento del movimiento del mouse.
- Narración de voz :Para grabar la narración de voz.
- Efectos de audio :elimine el ruido del audio o agregue efectos de aparición y desaparición graduales.
- Efectos visuales :agregue bordes, elimine colores y aumente o disminuya la velocidad del video.
- Interactividad :agregue un cuestionario para ver quién está viendo el video y su progreso.
- Subtítulos :Agrega subtítulos al video.
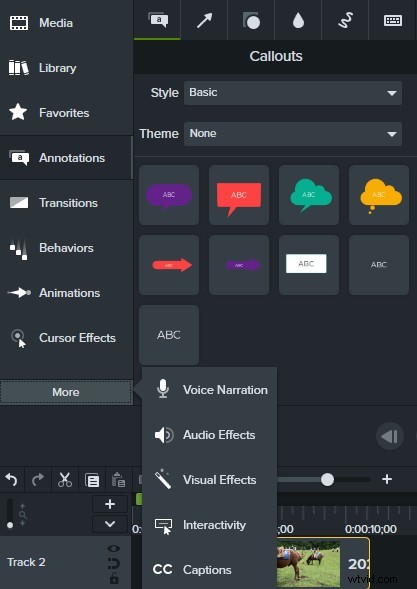
The Powerful Toolbox
Video Preview Window
In the preview window, you can preview not only the clips on the timeline but also the different effects. There are four main buttons:the Edit button (to move the media, resize, or rotate the screen), the Pan button (or just hold down the space bar to drag the screen to get a better view), the Crop button (or just hold down the Alt key to crop out unwanted areas of the screen), and the canvas scale and resize. Conveniently under the Camtasia preview window are the play, pause buttons, and the total duration of the video.
The scale of the screen can be adjusted with the mouse wheel.
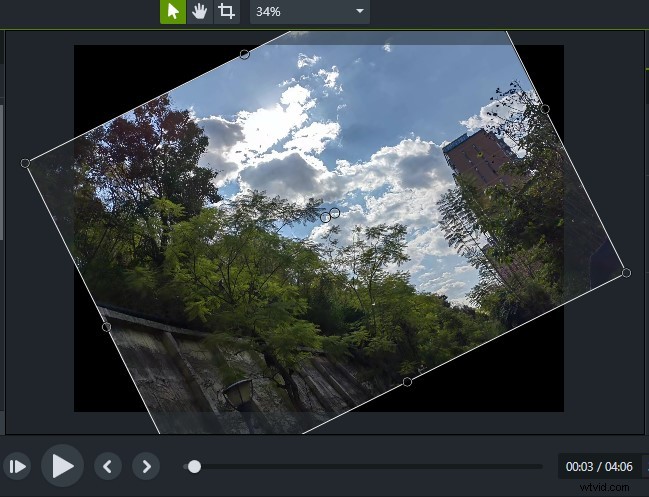
Camtasia Preview Window
Properties Toolbar
On the right-hand side of the main Camtasia screen, there is a prominent little green box – Properties. Here you can not only see the current settings of the selected screen. You can also set and adjust the Scale, Opacity, Rotation, Position, Width, and Height of the target. This column is also very important during the operation. (Hide with two clicks)
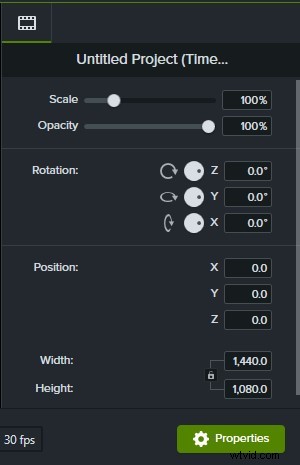
Camtasia Properties
Timeline Panel
There are two main ways to add the timeline in Camtasia. The first one is to drag the material directly from the material library to the timeline. The second is to click “+” on the left side of the timeline panel to add it. At the same time, the arrow buttons in the upper left and right directions have the functions of undo and return respectively, which gives you a chance to try and make mistakes. Here, cutting and segmentation are two functions that are easily confused. When you drag the cursor of the timeline to a picture, if you click Cut, the whole picture will disappear. If you click the split button, that picture will be split into two separate frames. The Copy and Paste buttons are the same as the Copy and Paste function we use every day. It can copy the effect or animation to the clipboard and paste it to the position you need. The active axis next to the magnifying glass icon can zoom in and out the entire timeline, which is used to adjust the time interval gap. This is very necessary when intensive care is needed. Similarly, the vertical movable axis on the left can adjust the height of each time axis. In the timeline, you can hide, lock, and enable the tracks on the timeline.
Use the red and green cursors above the timeline to Mark or add Quiz.

Camtasia Timeline Panel
Screen Recording
Camtasia’s best feature is the screen recording function, which can be regarded as one of the best software on the market at present, and it is in line with industry standards.
Click Record (shortcut Ctrl+R) on the top left of the main interface to directly enter the screen recording field. Then a small black box appears on your screen. Take Camtasia 2021 as an example. After clicking, there will be five parts:Screen, Integrated camera, Conexant SmartAudio HD, System Audio, and a Start button. You can accept the system’s default full-screen recording settings or choose to customize the screen recording range. Click on the drop-down arrow of the screen box and you will see more options. Clicking on Custom Region will allow you to make your screen size selection just like a screenshot. A preset window (16:9) will also be available in the software. If your recorded media will eventually be posted to Instagram or Facebook, Camtasia is kind enough to offer you a choice of platform-compliant options. Whether you turn the camera on or off is up to you. You can choose to turn the camera off when you are presenting a PowerPoint or tutorial and turn it on when you broadcast live. Also, if you only want to record your voice, you can simply turn off the System Audio option. So that some system sounds don’t make the whole video noisy. The microphone’s sound can be adjusted in size depending on the situation, usually with the option to turn the volume to maximum. Some preferences can also be set via Tool. Once all the details have been adjusted you can record directly by clicking the red button (shortcut F9). Camtasia allows you to pause the recording at any time after it has started, a feature that effectively saves some of the subsequent editing time. Click the Stop button (shortcut F10) when the recording is finished. The recorded material will be automatically saved to the Camtasia media pool and timeline. If there are frequent errors or unexpected situations during the recording process, you can delete them by clicking the Delete button and the interface will revert to the previous recording frame settings panel.
After recording with the use of Cursor Effects can highlight an area or clear mouse click position.

Camtasia Screen Recording
Audio Effects
When you import a piece of audio into Camtasia, you will see a green horizontal line on the timeline, which you can pull to adjust the sound level of the entire audio directly. Select Audio Effects in the toolbar to add effects directly to the audio. For example, you can embed a Fade in or Fade out sound effect at the beginning or the end. When you want to highlight the climax, you can add Emphasize sound effects, etc. The most noteworthy is the Noise Removal. Just drag it onto the entire audio and the system will automatically do the noise removal for you. This is very convenient and fast. Although Camtasia’s built-in settings for sound adjustments are limited and not up to the professional standards. But for most users, it can already meet their daily needs.
Slow playing sound can also play a role in setting off the atmosphere.

Camtasia Audio Effects
Interactivity
The interactive function of Camtasia is also very powerful. This is very suitable for teachers and some other online education lecturers. You can set the Quiz in the middle or the end of a course, change the quiz name in Properties, select the quiz type, set questions and answers, and check Display Feedback. Finally, you will find that you can adjust the follow-up of whether you answered correctly or not. If answerers don’t fill out the correct answer, you can set the video to automatically turn to a certain place to review again. And Camtasia allows you to set multiple questions. At the same time, viewers can also get happiness from multiple-choice, fill in the blank, short answers, and true/false.
This feature can be effective in keeping you focused during the viewing process.
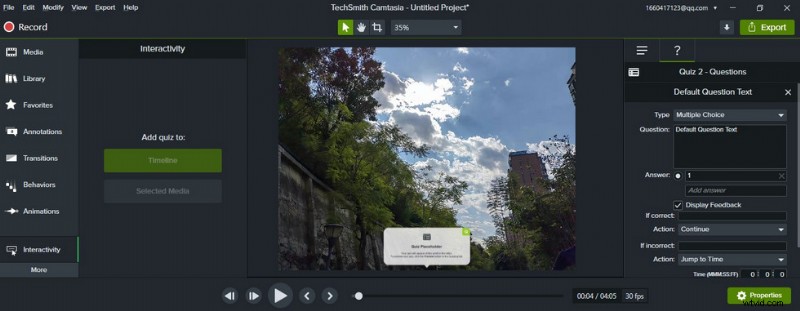
Camtasia Interactivity
Animations
The Animations feature in Camtasia can be used to enhance the viewing experience by zooming in, zooming out, rotating, and other effects to emphasize a screen, video, or commentary. Camtasia has 10 built-in Animations effects, which are similar to a camera lens zooming in for a close-up effect. The principle of each effect is similar except for Full Opacity and No Opacity, which are transparency adjustments. Select an effect and drag it to the clip-on top of the timeline. At this point, an arrow icon will appear on the timeline, which means it was successfully added. Click Zoom-n-Pan in the function bar to select the range where you want to generate the effect. If you want to revert to the original scale in subsequent playback, just click Scale to fit. You can change the time of the zoomed-in and zoomed-out effects by directly elongating or shortening the arrows on the timeline.
Partial zoom animation show effect.
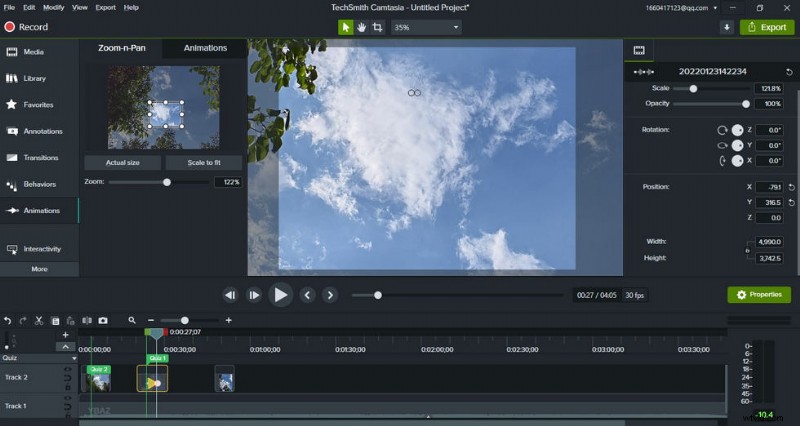
Camtasia Animations
Export
Once you’ve finished your clip and made sure it’s error-free, you can then export your entire work. Click directly on the Export option at the top and you’ll find that Camtasia gives you a variety of options for exporting and sharing:Local File, Screencast.com, Knowmia, TechSmith Video Review, Vimeo, YouTube, and Google Drive. You can also export a clip or audio separately.
The exported video formats are mainly MP4, WMV, AVI, GIF, M4A, WAV (Windows); or MP4, MOV, GIF, M4A, WAV (Mac). You can set the video size, frame rate, encoding mode, color mode, and other related specific parameters independently. Preview available before export.
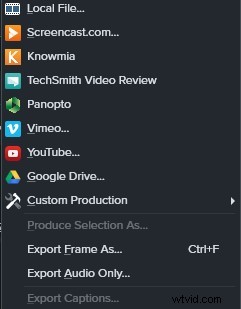
Camtasia Export
Device Support
Camtasia can run on both Windows and Mac.
Notes:
Windows 7 and below no longer support Camtasia 9.0 and above.
Windows 7/Windows XP please download version 3.0.
Is Camtasia Worth Purchasing?
All in all, Camtasia is a piece of very user-friendly video editing software. Its simple interface and rich training resources make your editing journey enjoyable and easy. Therefore, it is perfect for newcomers to the world of video editing. Camtasia can help you create training videos, explainer videos, live game recordings, video conference recordings, and more. This powerful feature is worth pursuing even for professionals.
Camtasia is designed to promote “Everyone can make a great looking video” to encourage all users to give it a try. 30 days trial period is set up to allow you to fully understand and experience Camtasia before deciding whether you want to purchase the Subscription.
Más artículos relacionados
- Los 10 mejores convertidores de MP4 a MP3
- Las mejores alternativas de Windows Movie Maker
- Las 3 mejores aplicaciones para convertir YouTube a MP3 para iPhone
- Diez programas Chroma Key recomendados
- 12 mejores programas de edición de video para YouTube
